App4Sales integration
App4Sales is a mobile sales application, that lets your sales agents place orders on behalf of your B2B customers. With this app the sales agent can easily display a digital catalogue with pictures of your products on a phone or tablet.
With this integration your data is synchronized between tracezilla and App4Sales, and has more advantages:
- Access to your real time inventory status.
- New customers added in App4Sales will be synchronized to tracezilla as a Partner.
- The sales agent has access to the customer data and previous orders.
- Send order confirmations by mail straight from App4Sales.
App4Sales can be used both online and offline. Please notice!, that your tracezilla warehouse will not be synchronized without internet access.
Preparing to configure the integration
Before you set up the integration, it can be useful to create and prepare the following:
Create a tag
Synchronization between App4Sales and tracezilla is mostly controlled by tags. Before setting up the integration, a tag must be created for new App4Sales customers, orders and SKUs, which are to appear in the App4Sales app.
- Click your company name in the upper right corner, and select Company Settings in the drop-down menu.
- Click the menu for Tags.
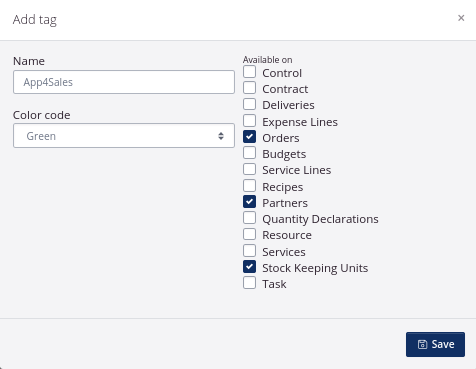
- Click Add new in the upper right corner.
- Name the tag, and tick the boxes for Orders, Partners and Stock Keeping Units.
- You can select a tag color.
- Click Save to create the tag.
Add tag to Stock Keeping Units
The newly created tag is used for the system to recognize which SKUs are to appear on your product catalogue in App4Sales.
- You add the tag to SKUs by clicking Warehouse in the top menu, and select Stock Keeping Units.
- Use the filters on the left to view the SKUs relevant for your App4Sales product catalogue.
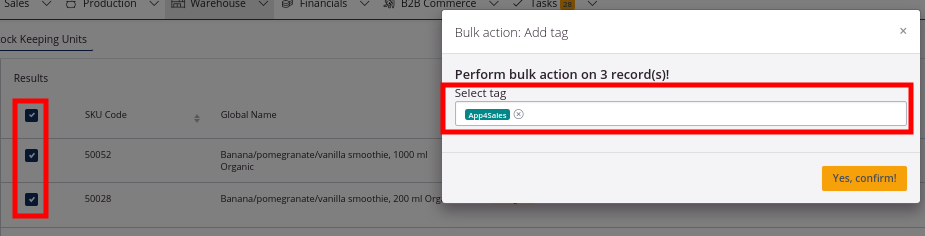
- Tick the boxes by the relevant SKUs.
- Click Bulk actions, and select Add tag.
- Select the tag e.g. App4Sales and click Yes, confirm!.
Add tag to customers
The tag is also added to customers expected to place orders via the App4Sales app.
- Click Partners in the top menu.
- use the filters on the left, to view the relevant partners.
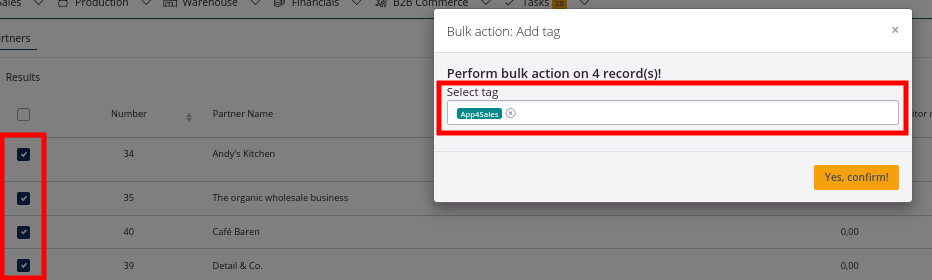
- Tick the boxes bu the relevant partners.
- Click Bulk actions, and select Add tag.
- Select the tag e.g. App4Sales and click Yes, confirm!.
Create a discount service (optional)
This gives you the option of giving your customers a discount, when they place an order through a sales agent using the app.
- Click Sales in the top menu and select Services.
- Click Add new in the upper right corner.
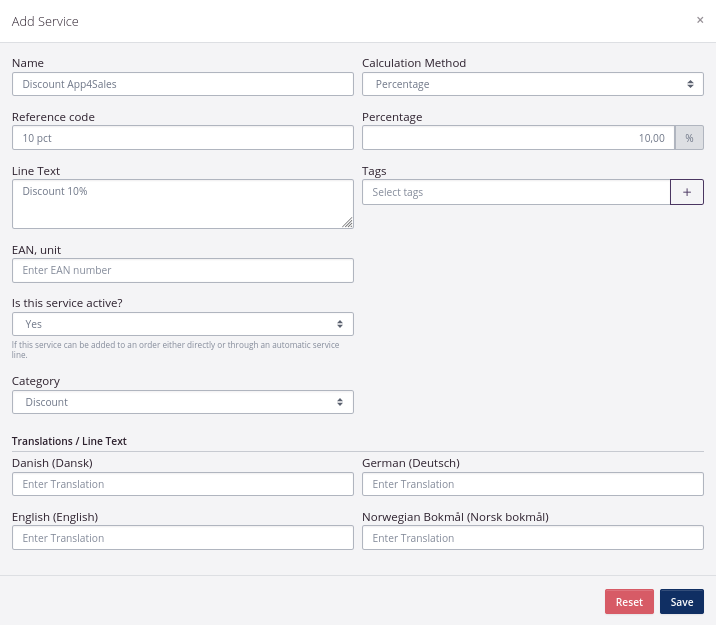
- Name the service and enter a reference code. The reference code must not contain symbols.
- Select the catagory Discount.
- Set the Calculation Method to Percentage, and enter the negative percentage (remember the negative sign).
- Click Save to create the service.
Set up the integration
- Click your company name in the upper right corner, and select Company Settings in the drop-down menu.
- Click Built-in Integrations.
- Click Connect and configure under App4Sales.
- Select Yes i the drop-down menu by Enable this integration.
- Enter all relevant information in the integration setup (see explanation below).
- Remember to click Save configuration, before leaving the setup.
The integration setup consists of three tabs: Basic Settings, Price Lists and FTP Connection. Read more about each tab in the following section.
Basic Settings
| Title | Explanation |
|---|---|
| Warehouse Location | Select the warehouse location of your products. This will be the location of which your stock is synchronized. Start by entering the partner name (company name) in the first field, and enter the location in the field below. |
| Language | Select the language of your products, documents and more. You can select multiple languages in your Company Settings. |
| Tag imported orders with this tag | Get a full view of your App4Sales orders, by giving them a tag, e.g. an ”App4Sales”-tag. This enables you to look up the specific orders in the order overview, and to generate a sales report of these orders. Please note, the tag must be created beforehand. |
| Tag imported customers with this tag | New customers can be created in App4Sales and synchronized to tracezilla as partners. You can filter out the newly created customers, by adding a tag, e.g. “App4Sales”. You can also create a separate tag for new customers, e.g. “New Customer”. It will most likely be necessary to add further information about the customers created in the App4Sales app. Please note, the tag must be created beforehand. |
| Upload SKUs with the following tag to the Catalog | You select which products are to be part of your product catalogue by adding a tag. Please note, the tag must be created beforehand. |
| Upload partners with the following tags | By adding a tag to a partner, the partner will appear in App4Sales. Information about the partner will be synchronized from tracezilla, including previous orders. Please not, the tag must be created beforehand. |
| Use Debtor No. instead of Partner No. | If you are have an accounting system integration, e.g. e-conomic, you can synchronize the debtor number into tracezilla. When a partner is created in tracezilla, a unique partner number is automatically added. You can choose to overwrite this partner number i App4Sales, for the debtor number from your accounting system to appear in stead. |
Price Lists
You can add up to 4 price lists in App4Sales. These price lists are taken from tracezilla.
Note! You can add multiple price lists in tracezilla. We recommend, that you have sales price lists based on general customer groups instead of specific customers. These customer groups can be “Retail”, “Distributors”, etc.
Price lists must be created beforehand and added to partners, who are expected to place orders through App4Sales.
| Title | Explanation |
|---|---|
| Price List #1 | Select a price list from the drop-down menu. If the price lists is added to a customer, these prices will apply. |
| Price List #2 | Select a price list from the drop-down menu. |
| Price List #3 | Select a price list from the drop-down menu. |
| Price List #4 | Select a price list from the drop-down menu. |
| Fallback price list | If no price list has been entered for a customer, the fallback price list will apply. We recommend this being a standard price list with default prices. |
| Discount Service | If you wish to give a discount to a customer, you can create a Service in tracezilla, and select the service in this field. |
FTP-connection
To enable synchronization between tracezilla and App4Sales an FTP server is needed. The FTP server acts as a intermedieary.