Fortnox integration
If you have a Fortnox account, you can integrate your Fortnox account with tracezilla. NOTE! You must enable the Integrations extension in Fortnox in order to use the integration.
To be able to use Fortnox together with our service, you need to have an integration license in Fortnox. This license is required to be able to activate and use integrations between Fortnox and external systems. Your Fortnox account can be connected to an unlimited number of integrations via API with an integration license.
According to Fortnox, here’s how to order or activate an integration license:
- Authorization: Only a person with the role of system administrator can add or activate integration licenses.
- Activation: Click on the company name in the top right of Fortnox. Select Manage integrations. Click on Order more licenses to get to the marketplace. Here you can purchase or activate an integration license.
With the integration, you have the opportunity to synchronize your customers, suppliers, articles and services between tracezilla and Fortnox. In addition, you can create invoices in tracezilla, which are posted directly in Fortnox. At the end of the month, you can transfer inventory value from tracezilla to Fortnox. Additionally, it is possible to match supplier/vendor verifications/attachments from Fortnox with purchases in tracezilla.
Setup step by step
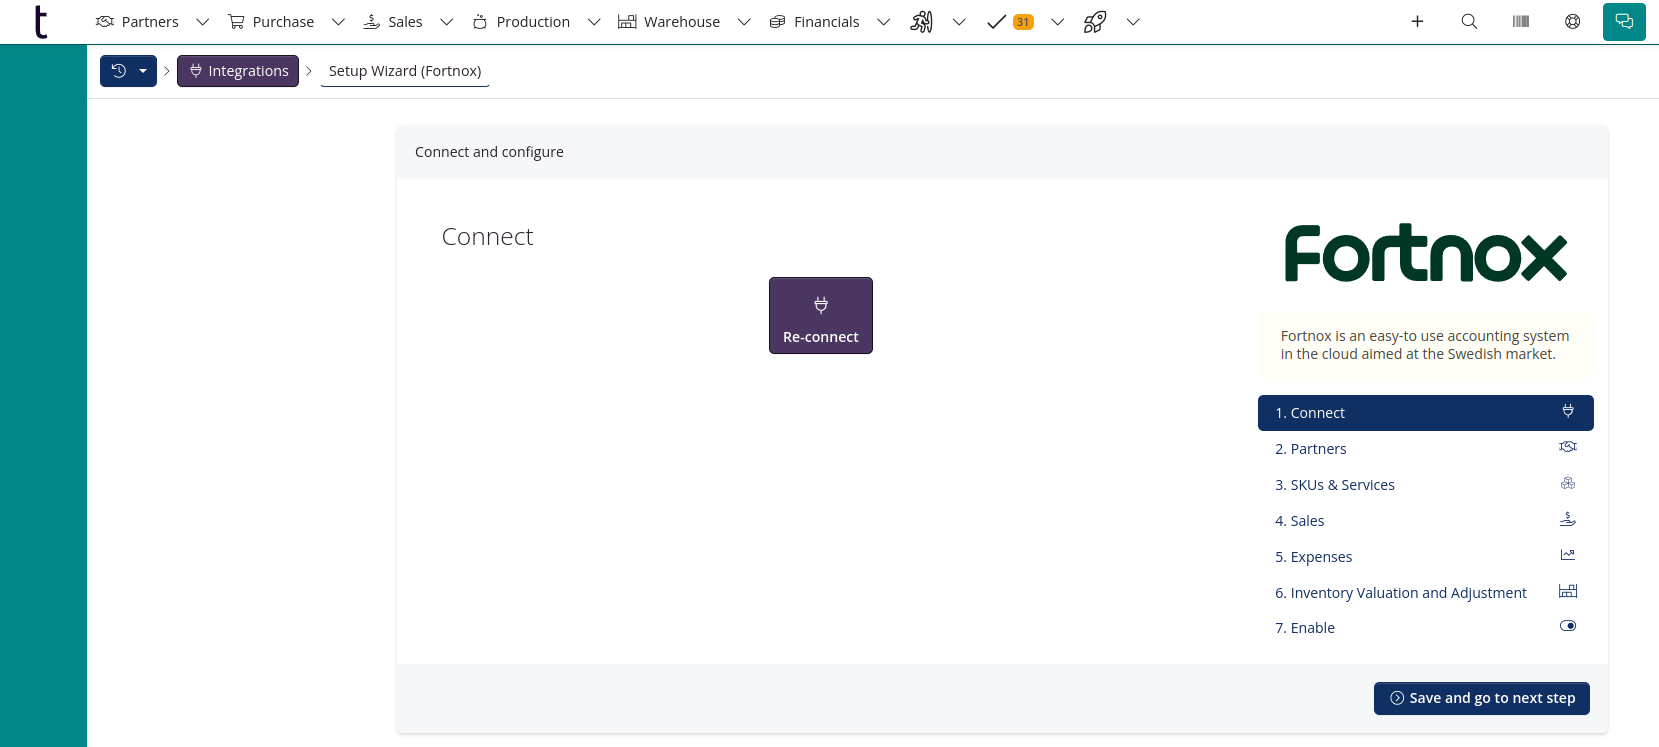
Step 1/7: Connect
- Log in to your tracezilla account.
- Click on your company name and select Company Settings.
- Go to Integrations.
- Click on Fortnox.
- Click Connect.
We recommend that you are logged into your Fortnox account (as Admin) while doing this. Then tracezilla will be able to make the connection automatically.
- Click Add App.
After that you will be able to configure the rest in tracezilla.
Step 2/7: Partners
In tracezilla, the term Partners includes both customers and suppliers. It is not unusual to be both supplier and customer. In tracezilla, you avoid getting double accounts on the same partner. Make sure the name of customer/supplier in Fortnox identical with the name in tracezilla, to ensure they are created as a partner in tracezilla.
When you start using tracezilla, you can import all your suppliers and customers from Fortnox. You do this by selecting Yes under Transfer of data > Pull suppliers and customers from Fortnox to tracezilla.
Under Tags you can choose to assign tags to the customers and suppliers you import. That way you still get the setup you know from Fortnox.
When you create new customers and suppliers in tracezilla, these are automatically created in Fortnox when you give the partner the tag Customer or Supplier (or both).
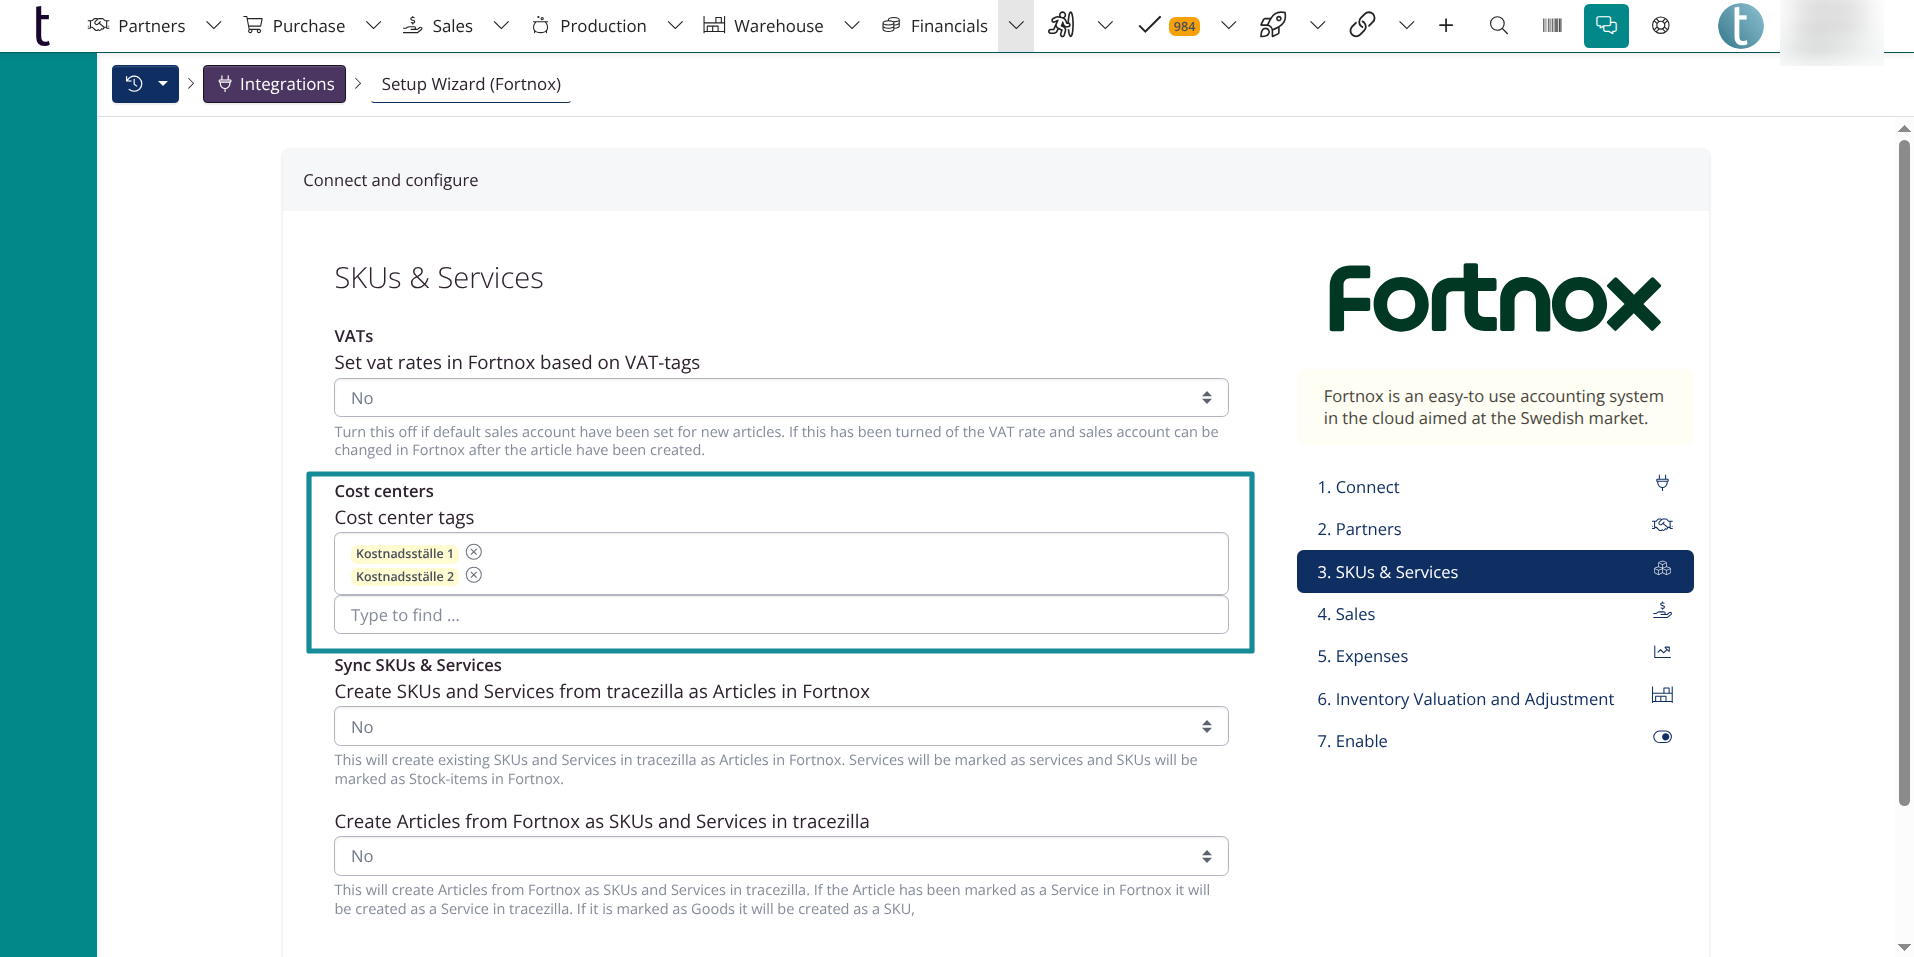
Step 3/7: SKUs and Services
We recommend that you select No under Set VAT rates in Fortnox based on VAT-tags. Then you can edit the accounting settings (VAT rates & sales accounts) directly in Fortnox.
The settings under Sync SKUs and Services are only relevant when you are implementing tracezilla. By selecting Yes under Create Articles from Fortnox as SKUs and Services in tracezilla, you can transfer your SKUs and services to tracezilla.
After you have integrated Fortnox with tracezilla and the integration is active, new articles will automatically be transferred to Fortnox when you create them.
VAT rates: You can set VAT-rates with the help of tags and VAT-settings. Here you can read more about VAT settings.
Read also the blog post Prepare for the new VAT regulations with tracezilla!
Cost centers (Optional)
You have the option to configure cost centers between tracezilla and Fortnox. To do this, create one or more tags. In the tag settings, you can specify which cost center in Fortnox the tag should be linked to. The tag should of course be added to the SKUs that the cost center refers to. Finally, you must select the tag in the field Cost Center Tags.
Step 4/7: Sales
We recommend that you select Yes under Book invoices in Fortnox. Then the invoice is automatically posted in Fortnox via the integration and you avoid doing redundant work.
Select Yes under Book invoices in Fortnox, if you want to invoice via tracezilla.
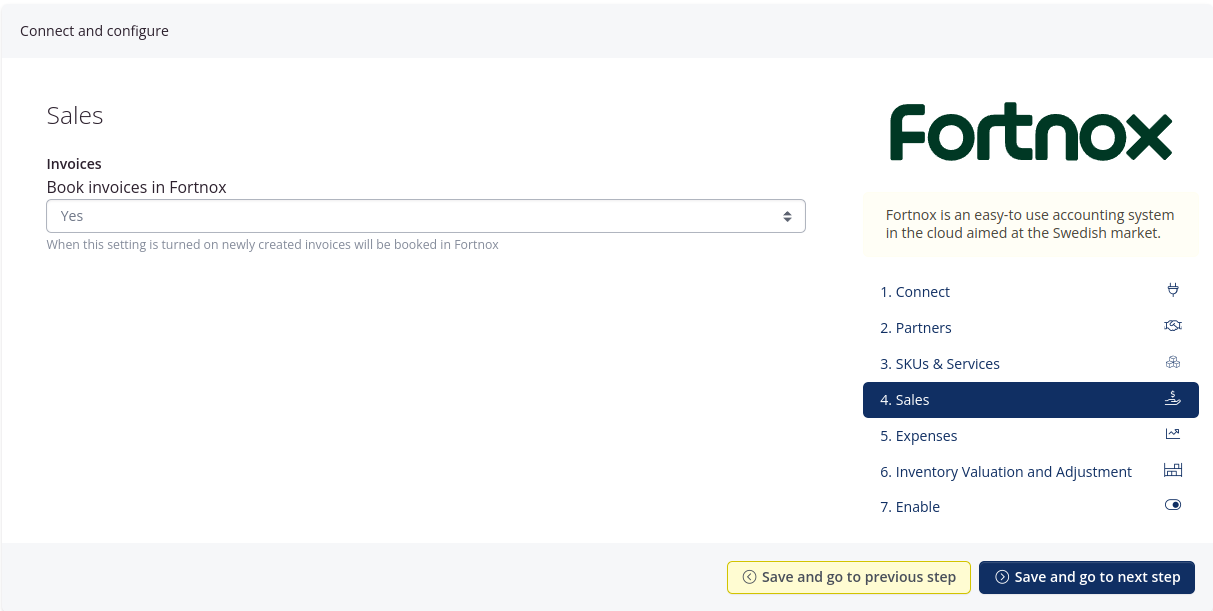
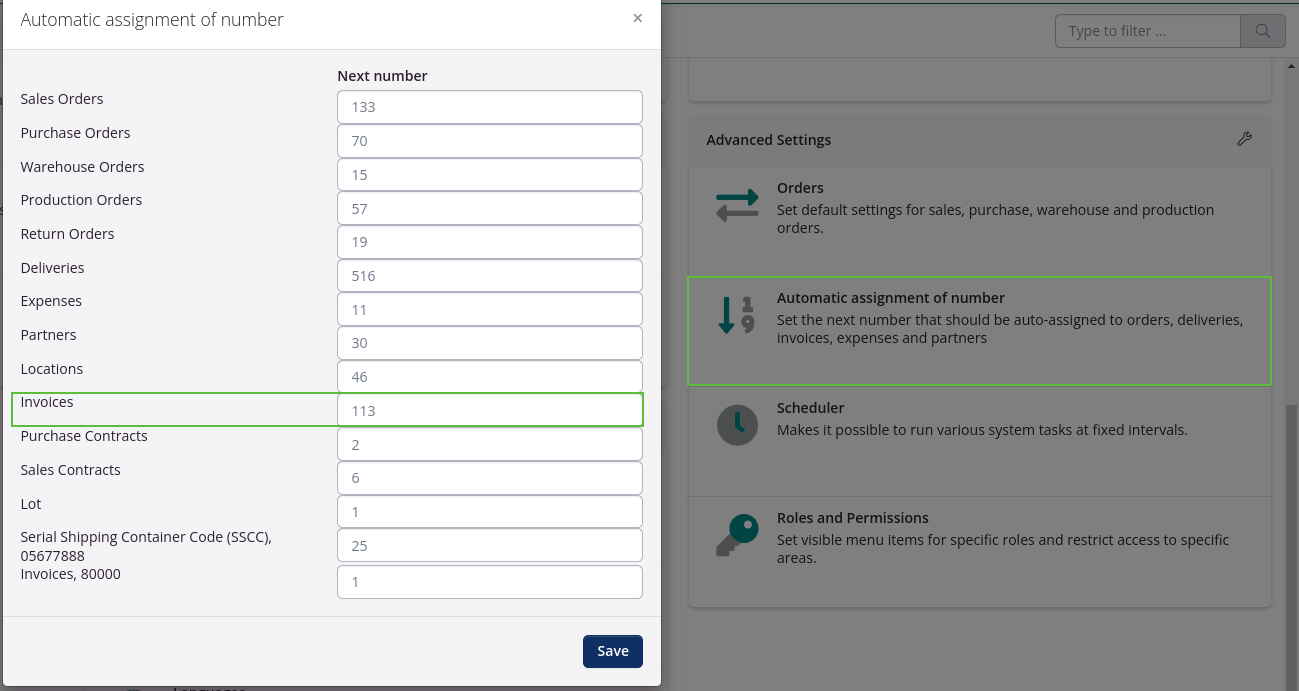
You may need to go to Company Settings > Automatic assignment of number and adjust the Invoice number settings to fit with Fortnox.
Step 5/7: Expenses
This step is optional and requires that you have enabled Actual Cost Pricing under Extensions in your business settings. Then you can pull expenses (supplier vouchers) from Fortnox and link them to orders and lots. Then you will also see actual cost prices in tracezilla reports and orders etc.
Pull expenses from Fortnox to tracezilla
- Select the date you started with tracezilla under Pull expenses with posting date as of.
- Under Mapping of GL accounts you can map all accounts with Fortnox. Multiple account numbers are separated by commas.
- Once this is done, you have the option to pull expenses from Fortnox by clicking the button Pull from Fortnox under Finance > Expenses.

Step 6/7: Inventory Valuation and Adjustment
When transferring the inventory value from tracezilla to Fortnox, you can use the expected or actual inventory value. Select either Expected Inventory Valuation or Actual Inventory Valuation.
tracezilla defaults to the expected stock value (the one created in tracezilla). If you want to adjust according to the actual inventory value, enable Actual cost prices under Extensions in your company settings.
You can read about expected and actual costs here.
Account configuration
Under Default GL accounts, you can configure your GL account settings for the inventory valuation. This is important to get set up before you start transferring your inventory valuation.

In this tutorial you can read more about how to transfer the inventory valuation to Fortnox at the end of the month. NB: This guide is only available in Swedish.
Step 7 of 7: Enable
In this section you confirm that you want to enable the integration.
If you want to create test orders and invoices, you can turn off the integration with Fortnox again after your partners and articles have been pulled to tracezilla. When you are ready to use the integration, remember to re-enable the integration.
E-invoicing
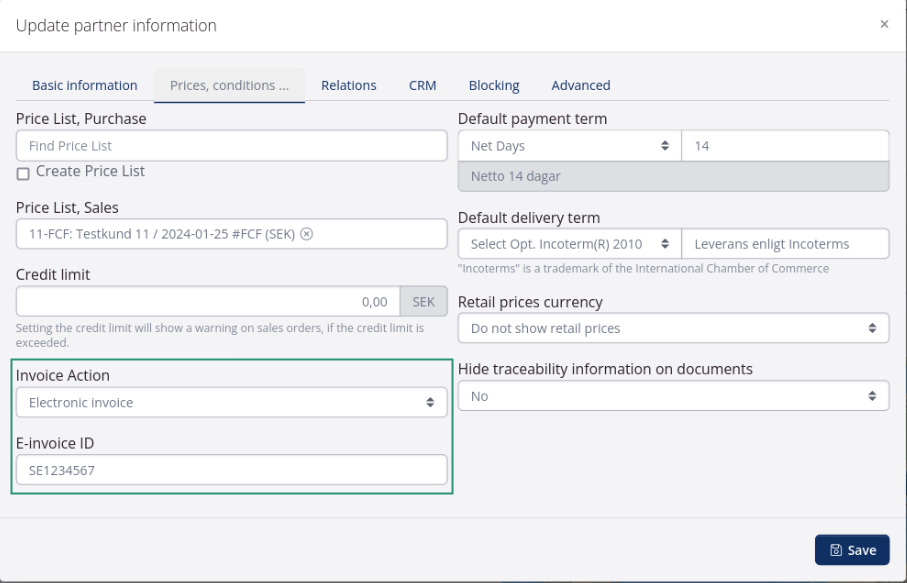
If you have activated e-invoices in Fortnox, you have the option of sending e-invoices to your customers from tracezilla. You must first add the customer’s e-invoice ID (organization number) in tracezilla. You do this in the partner settings in the field E-invoice ID. Don’t forget to select Electronic invoice as the invoice action.
Problems that may occur
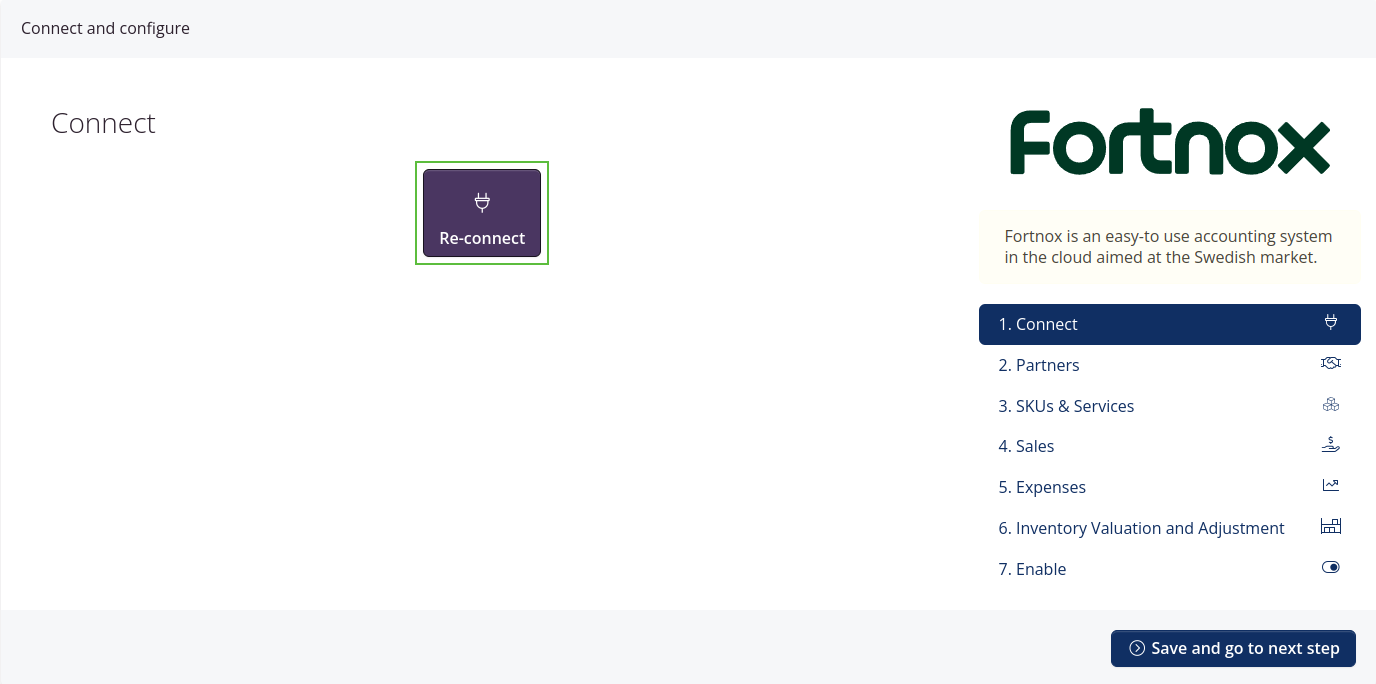
Integration has been lost
The error message “resulted in an Unauthorized response” or Missing authorization indicates that the connection has been lost and you need to re-connect the integration between tracezilla and Fortnox. We recommend that you are logged in with your Fortnox account while clicking the Re-connect button. You do not need to do anything with the rest of the integration settings.
If you have problems with billing or the integration, you are always welcome to contact support and send a screenshot via chat or email.