tracezilla on your mobile phone
tracezilla is a cloud-based application. This means you can access tracezilla from any device, as long as you have internet access.
tracezilla is responsive, i.e. the display of the application adapts to your screen size. It enables you to use tracezilla on a mobile phone. There is no tracezilla app to download from the App Store or Play Store, but you can create a tracezilla shortcut for your phone. This shortcut is shown on your screen, just like any other app, and you will always have tracezilla at hand.
You must complete the Setup Wizard in Company Settings > Misc. > Setup Wizard before you can use the mobile version.
Create a tracezilla shortcut on your iPhone
- Open you internet browser on your phone, and enter the tracezilla website www.tracezilla.com.
- Click the arrow-up icon at the buttom of your browser.
- Add to home screen.
- Name your shortcut.
- Now, the tracezilla shortcut will appear on your screen by your other apps.
Create a tracezilla shortcut on your Android
- Open you internet browser on your phone, and enter the tracezilla website www.tracezilla.com
- Click the three dots in the upper right corner of the browser.
- Add to home screen.
- Name your shortcut.
- Now, the tracezilla shortcut will appear on your screen by your other apps.
Benefits of using tracezilla on your phone
There are many benefits of using tracezilla on your mobile. It enables you to receive incoming orders when the orders are delivered, and adjusting the orders while checking the deliveries. By accessing a purchase order, you can adjust the incoming lot lines, and you can remove the batches you do not wish to accept due to damage, incorrect delivery, etc.
By using tracezilla on your phone, you have the most important features available, and always at hand.
With the tracezilla Tasks and Controls add-on, you can view and complete tasks, e.g. receipt control and much more. Read more about tracezilla’s Tasks add-on here.
Did you know ?: If your label printer is connected to wifi, you can access the printer directly from the phone and have a number of labels printed. Both internal labels with a QR code, and GS1 parcel labels for outgoing orders.
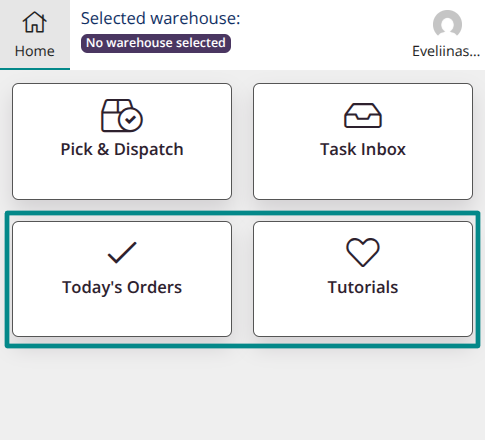
Home screen
When you log in to your tracezilla account on your device, you will see the Home screen showing the menu below:
- Receive Order
- Pick & Dispatch
- Find lot
- Orders
- Partners
- Task Inbox

The individual menu points are described below.
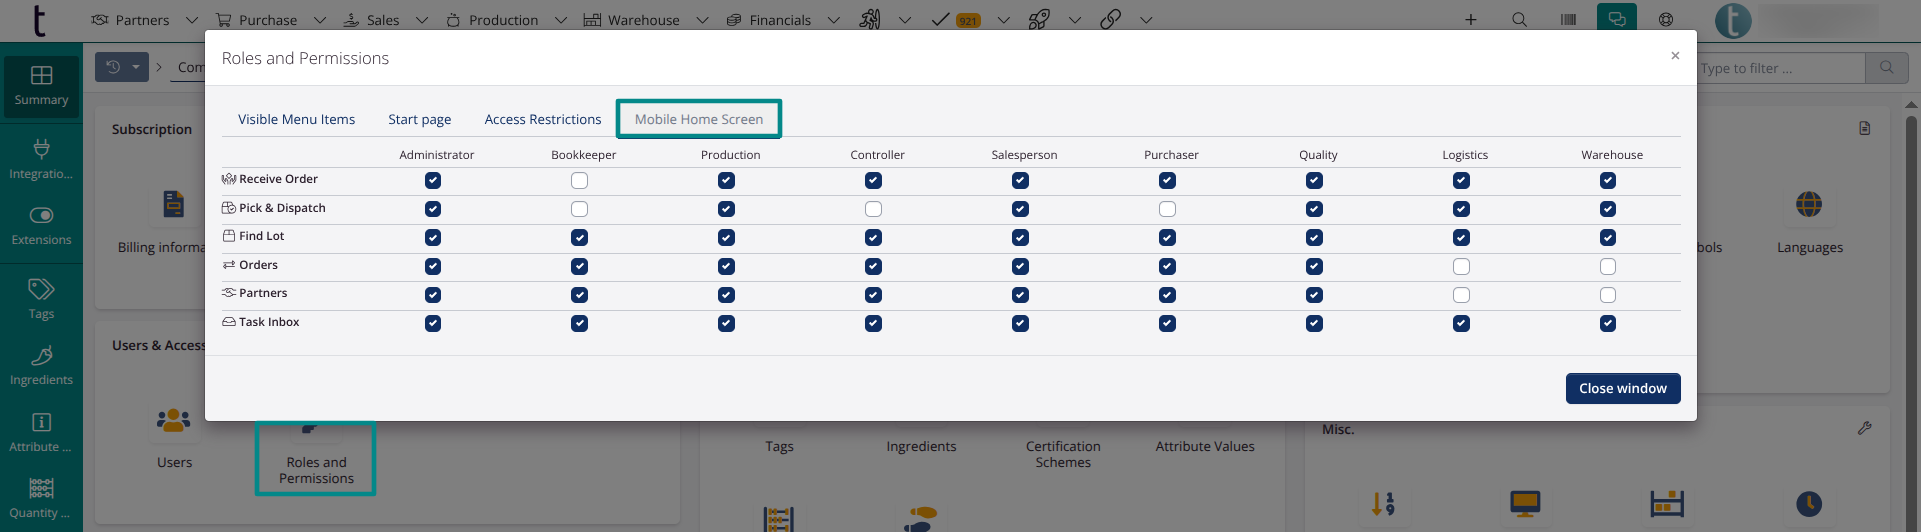
Customise start screen
In company settings it is possible to customise the display for the different user roles.
You will find the settings in Company settings > Users and access > Roles and permissions > Mobile home screen.
Add customer menu options
You can show custom menu options in the mobile version.
Example:
The setting is in Power Pack > Embedded External Dashboards > Show in mobile view.

NOTE! You need Power Pack to add custom menu options!
The individual menu points are described below.
Receive Order
You can receive orders in tracezilla on your device. When doing so, you are also able to split an incoming order, in case of backorders or errors in the delivery. You can furthermore enter traces for traceability, complete tasks and print labels, when receiving your order. Hereby minimizing risk of error.
Simple receipt
When receiving an order, it can be registered by a few taps. This can be done for purchase orders, production orders warehouse orders and return orders.
You recieve an order as follows:
- Tap Receive order on your home screen.
- Select the relevant order type.
- Use the search field to find the relevant order, or select the order in the order overview.
- In the order view you can choose to receive the order immediately by tapping. Recieve all.
Enter traces for traceability
You can enter or scan traces to the lots as follows:
- Go to the purchase order.
- Tap the +-symbol left of the SKU.
- Tap the specific lot to which you wish to add traces.
- You can now scan a barcode on the product label. You do this by tapping the barcode symbol on the right of the search field, and hold the scanner over the barcode. By this, available data will be uploaded. Remember to tap Save.
- You can furthermore enter Batch Number, additional Lot Number, Date: Manufacturing, Date: Best before and Date: Use by.
Adjust received quantity
If you only receive a part of the ordered quantity, and the rest is in backorder, you can split the lines, and only received the delivered quantity. The procedure is as follows:
- Go to the order.
- Tap the SKU you wish to split.
- Tap the lot.
- Enter the received quantity in the field Quantity
- Tap Split line at the bottom.
- Tap Save.
- Repeat for other lots if needed.
The recieved quantities will now have the status Confirmed, while the rest will have the status Expected.
When the order is fully updated, you can recieve the confirmed lots by tapping Receive confirmed. When recieving the rest later on, you can simply go to the order and tap Receive all.
Assign Storage Bin (attributes)
If you wish to assign storage bin attributes to your lots, you find the procedure in this tutorial under Find Lot > Lot Attributes.
Pick & Dispatch
In Pick & Dispatch you can easily select the lots being picked.
- Tap Pick & Dispatch on the home screen.
- Select the relevant order type.
- Select the order from the overview, or use the search filter to find the order.
- Tap the SKU you wish to pick.
- You will now see all lots avialable for picking. Enter the picked quantities of the correct lots.
- Tap Save.
Find lot
When tapping Find lot you are enabled to find a specific lot by entering SKU number or SKU name in the search filter. If you use tracezillas labels for internal use, you will furthermore be able to scan the unique QR code of the lot, and thereby be navigated directly to the lot data page.
When entering the lot data, you have several options, e.g. adjusting the ingoing order line, where you can edit expiration dates, attributes and more. You can also add the lot to an order, adjust the quantity and print labels.
Lot attributes
When a lot is selected in the Find lot menu, it enables adding and adjusting lot attributes. This can especially be relevant when using Storage Bin attributes, and wanting to register the storage bin of the specific lot. Please notice, that attributes must be already created and activated beforehand.
- Find the lot by using the search field at the top, or by scanning the QR code on the label for internal use.
- Tap the lot to enter the lot data page. (If using QR codes, you will automatically be navigated to the data page.)
- Tap Edit ingoing order line.
- Scroll down to Lot attributes.
- Adjust lot attributes.
- Tap *Save.*
Scanning location
You can also add a Location attribute via scanning on the lot page. This is the GS1 location code 99, which can be transferred from GS1 barcodes to the lot as a Location attribute.
Orders
In the catagory Orders you can find all orders, and you can create new orders.
Find order
- Tap Orders on the home screen.
-
Tap the relevant order type.
The order overview will now be shown. - Select the relevant order in the overview, or by entering order number or partner in the search field.
Create order
- Tap Orders on the home screen.
- Tap the relevant order type.
The order overview will now be shown. - Tap the + symbol at the bottom right.
- Fill in Order Details etc. just as you would do on your computer. If you are unsure of how you create an order, you can read more in the tutorials for each order type here.
Scanning
You can add product lines to your orders by scanning EAN codes. If you scan under Add Single, a unit of measure/box unit will be added to the order. If you scan under Open Form, you have the option to edit quantity etc. in the same window after scanning.

mobile-version-orders-scanning
Partners
By tapping Partners, you will be redirected to the partner overview. You can search for any existing partner. When tapping a specific partner, you are enabled creating new orders by tapping Create in the upper right corner, and selecting the relevant order type in the drop down. When the order type is selected, you can create the order, just as you would on your computer. If you are unsure of how you create an order, you can read more in the tutorials for each order type here.
From the partner overview you can also create new partners by tapping the + symbol in the bottom right corner. When adding a partner on your device, you can enter enter the same information as you would on your computer. You can read more about creating partners in this tutorial.
Task Inbox
If you subscribe to the Tasks & Controls add-on, you can access your task inbox. Read more about Tasks & Controls here
More
QR codes
QR codes are mentioned multiple times in this tutorial. This is because tracezillas labels for internal use is can generate unique QR codes for each lot in your warehouse. By using these labels you can optimize and simplify multiple steps in your work flow - from receiving goods to dispatch.
Below, you can read how to print your own labels for internal use.
Print labels
Print labels for internal use (QR codes), colli labels and labels with product information. If you wish to print labels for lots, you can do the following.
- Tap the menu for Find lot on your home screen.
- Use the search field to find the relevant lot.
- Tap the lot to enter the lot data page.
- Tap Print label.
- Select the label format. Internal format is selected as default.
- Enter a Remark (optional).
- Select the information you wish to appear on the labels.
- Tap Print labels.
From here, you get redirected to the standard printer settings on your device. In most cases, the following steps will be: - Select a printer if none is set by default.
- Select number of Copies and Size of the labels.
- Adjust further settings if needed.
- Tap the printing symbol.
Complete tasks
If you are subscribing to tracezilla’s Tasks & Controls add-on you are enabled to register and complete tasks, such as receipt control and more. Tasks assigned to specific orders and work flows are shown on each order, and are accessible by a single tap.
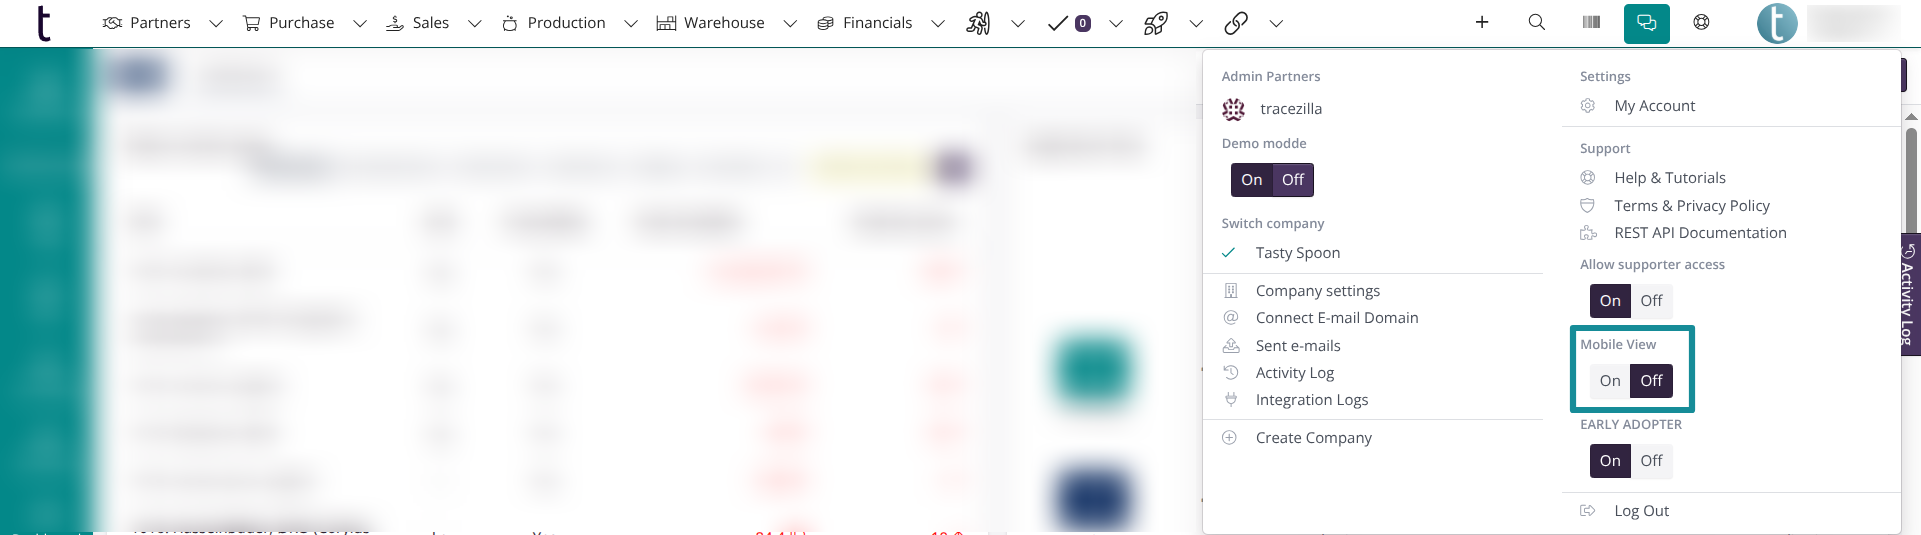
Access to mobile version from computer
You can test/use the mobile version on the computer. You switch between the desktop and mobile version under Mobile View.