Partners
Partners are all types of contacts - customers, suppliers, forwarders, certification bodies, etc. Your own profile is also added as a partner and marked as My profile in the partner overview.
To go to your partners, click Partners in the top menu. You can search for a specific partner using the filters in the left side of the screen.
How to add a partner
-
Click Partners in the top menu.
-
Click the button Add Partner in the upper right corner.
Basic information
-
The fields Name and Country are mandatory til fill in.

- If the partner country is set to Great Britain (GB), an additional field will be displayed to enter the EORI number.
- You can choose the currency primarily used when trading with the partner in the section Default currency.
- Languages must be enabled in you Company Settings before you can select them.
- The Owned by employee field can be used to specify a user to be selected as the default for new orders for the specific partner. This will overwrite rules set in order settings.
- You can add tags to your partner. Read more about tags here. You can use tags to organize and structure content.
- Type in the VAT ID of your partner’s company.
- If the partner country is set to Great Britain (GB), an extra field for a EORI code will appear.
- Fill in the partner’s contact informations in the sections Email, Phone and Fax.
- If wanted, you can add the partners web address, too.
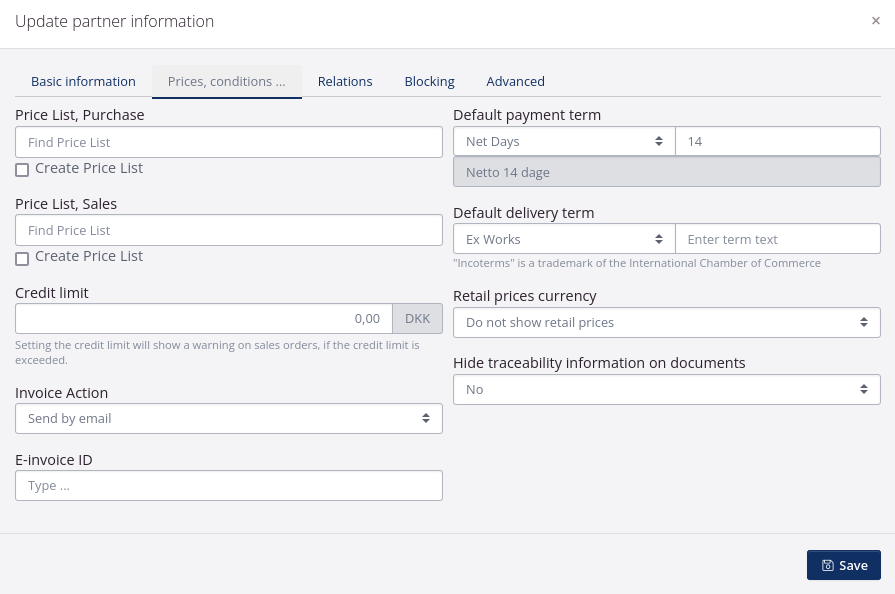
Prices, conditions …
-
In the top fields it is possible to select price lists for the partner. If a price list has not been created, you can automatically create one by ticking the box. You can find out more about price lists here.
-
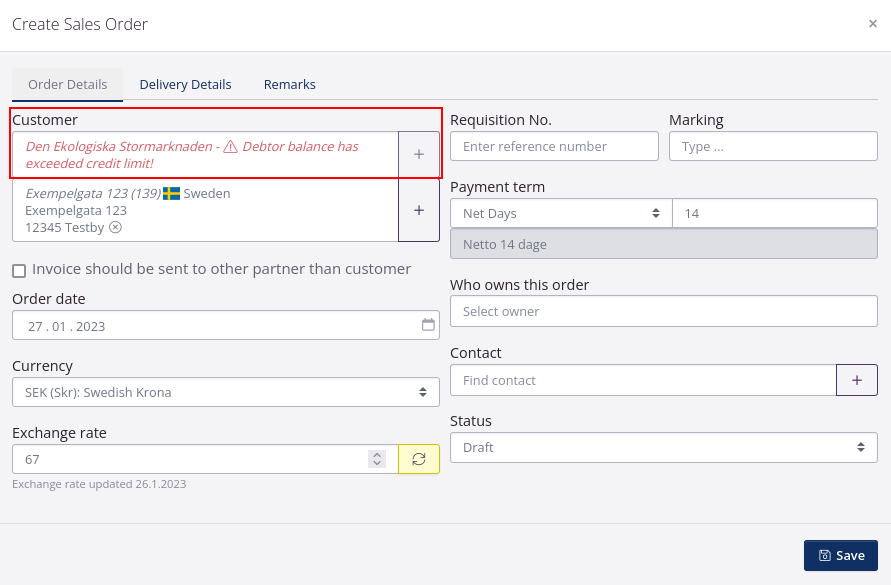
You can add a Credit limit for the Partner. This is connected to the Debtor balance shown in the partner view. The balance can be synchronized automatically with your accounting system via integrations, e.g. Fortnox. Setting the credit limit will show a warning on sales orders, if the credit limit is exceeded. See example below.
- You can choose an Invoice Action. This is an action triggered when an invoice is created. E.g. You can choose, when an invoice is created for this partner, it will be sent as an e-mail, or shown as a PDF.
- The field E-invoicing ID can be used to electronic invoicing.
- You can choose Default payment terms, e.g. Net 14 days. If you choose Custom or Pay in advance you must enter a text in the line beneath, e.g. “50% payment in advance”.
- You can also choose Default delivery terms. Read more about INCOTERMS here.
- In the field Retail prices currency, you can select the currency of the retail prices you wish to appear on invoice documents for this partner.If you do not wish for retail prices to be visible on these documents for this specific partner, leave the field as it is with the text Do not show retail prices. For retail prices to appear on documents, the prices must be added to the relevant SKUs.
Read more about Retail prices here.
Read more about adding and updating SKU data here. - With the field Hide traceability information on documents, lot/batch number and similar information can be hidden from documents for this specific partner.
Relations
- On the tab Relations you can specify default actions for orders that involve the partner. When you create an order featuring the partner, some informations will automatically be filled in. You can overwrite it in the order if you need to make an exception. It is optional to add relations to a partner. You can also add a Parent Partner. Read about this further down this tutorial.
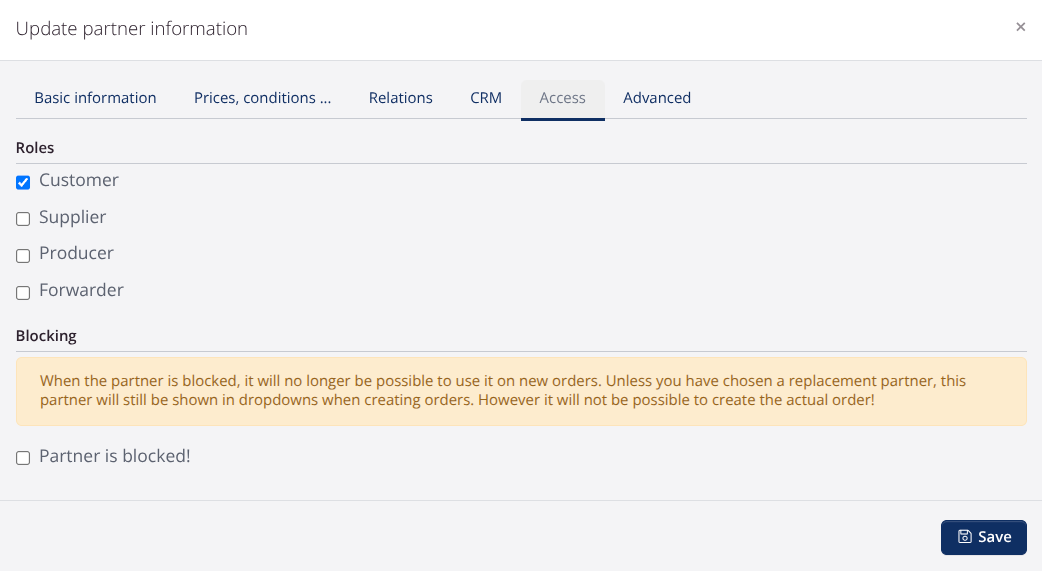
Access: Roles & Blocking
You can control how your partners can be used for orders. Under the Access tab, you choose which roles the partner should have.
You can set default roles in Company Settings > Basic Settings for Master Data > Partners > Misc..
If you have Tasks & Controls module, you can also create tasks for partner approval in tracezilla. The purpose is that the task must be completed before the partner can be given a certain role.
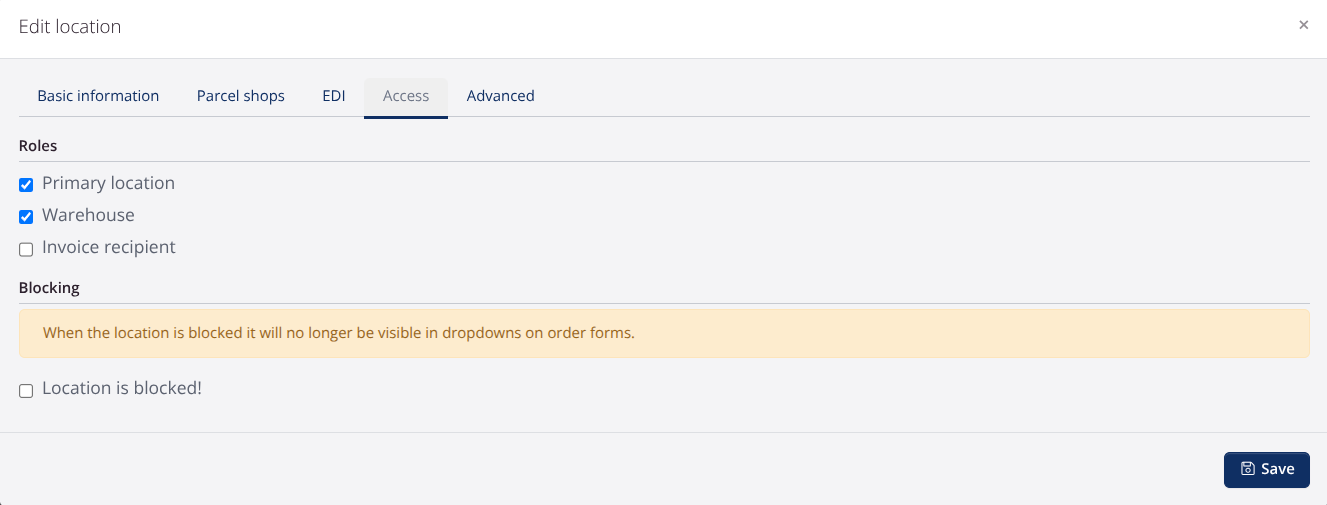
Blocking
You can block a partner. This might be useful e.g. if you no longer have a contract with a former partner. Click Edit and find the page Blocking. Tick off the window Partner is blocked! When doing so, you get the choice of entering a replacement partner.
Advanced
- Under the tab Advanced, it is possible to make custom settings for GS1 pallet labels. Please contact us for further information.
You can use the following AI (application identifiers): 00, 02, 10, 15, 17, 37, 400, 410 and hide. Use semicolon to seperate the AI in the same barcode.
- When you have filled in the information, click Save and Add location. It is not required that you add a location instantaneously but when using a partner to create an order, you need to select a location.
Add location
Basic information
-
In the tab Basic information enter the Address information.
NB! If you want the name of a specific department to appear on documents like invoices or if the name contains important information that is important for goods to be delivered to the correct place, e.g. if there is a department with a specific name, you can enter the department name in the upper address line followed by the address (street name and number) in the lower line.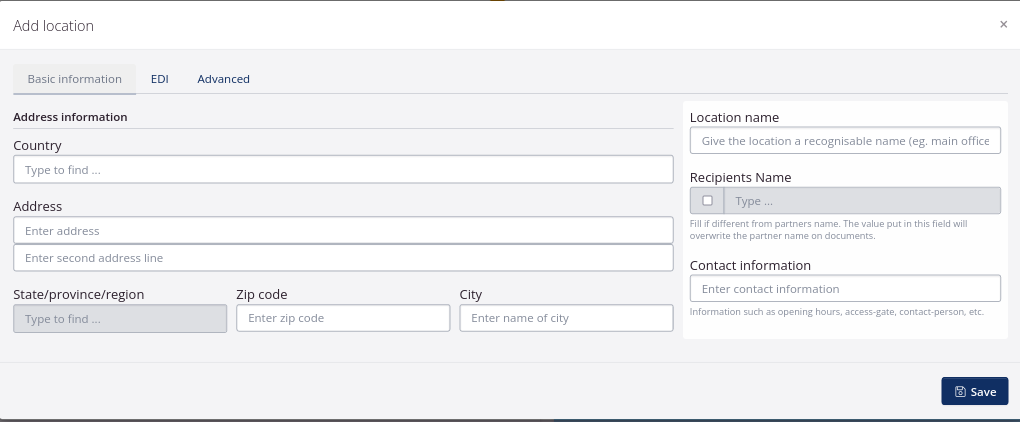
-
On the right, enter the Location name of the partner, e.g. Main office, Warehouse, Department, etc. The location name is for internal use in tracezilla which helps you distinguish between the locations and select the correct location when creating orders. The location name will not appear on documents.
-
The field Recipient’s name is only entered if the partner name is to be overwritten by another name on documents. See example here.
-
In the field Contact information you can enter an optional information about the partner, e.g. phone number, e-mail address, etc. The contact information is for internal use only, and will not be appear on documents. If you want contact information to appear on documents, it is possible to add specific Contacts to the partner. Read about this further down this tutorial.
EDI
-
In the tab EDI you can enter a Global Location Number (GLN/EAN) as used in e.g. invoicing by EDI. You can read more about GLN here. Remember to also enter an EDI method.
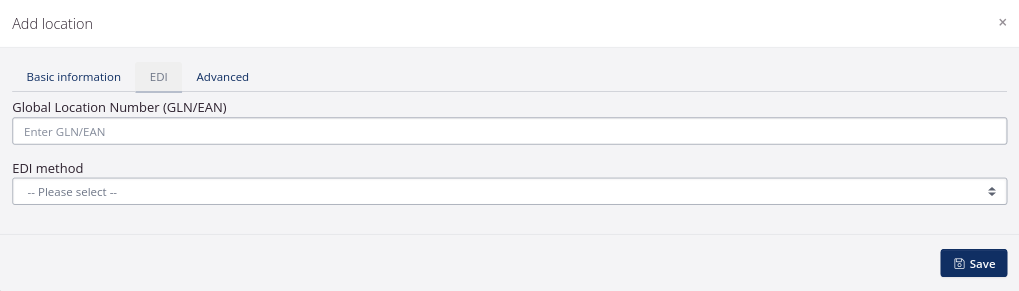
-
Choose an EDI method, if a GLN/EAN has been entered above.
- UBL: International standard, for exchanging business documents in XML file format. E.g. order confirmation, transport booking and invoicing.
- EdiFact: UN Standard for exchanging data between business partners. E.g. order confirmation, transport booking and invoicing.
- Peppol: International standard used to invoice public authorities.
Access You have the option to select different roles for partner locations.
-Primary Location Primary locations can be selected as default locations.
-Warehouse This role allows you to control which locations can be used as warehouse locations. In other words, only locations that are marked as warehouse locations can be selected in the Deliver to partner-field on purchase orders and in the Pickup from partner-field on sales orders. The same applies to the Pickup lots to be consumed in production (ingredients) from and Deliver produced lots to fields on production orders, and the Pick Up from partner and Deliver to partner-fields on warehouse orders.
-Invoice recipient Locations that are marked as invoice recipients can be selected as Customer and/or Invoiced to.
Advanced
- In the tab Advanced a location can be given a Reference code of your own choosing, which can be used as an abbreviation for the location. The reference code is for internal use in tracezilla only, and will not appear on documents.
- If relevant you can enter a World wide web address.
-
Enter relevant location Tags.
-
You can specify that all goods in a (warehouse) location should not be traceable. Click the Advanced tab to tick the box. Then all goods that are moved to this location will be without traceability, even if the goods were previously traceable, e.g. for use of the iPos integration.
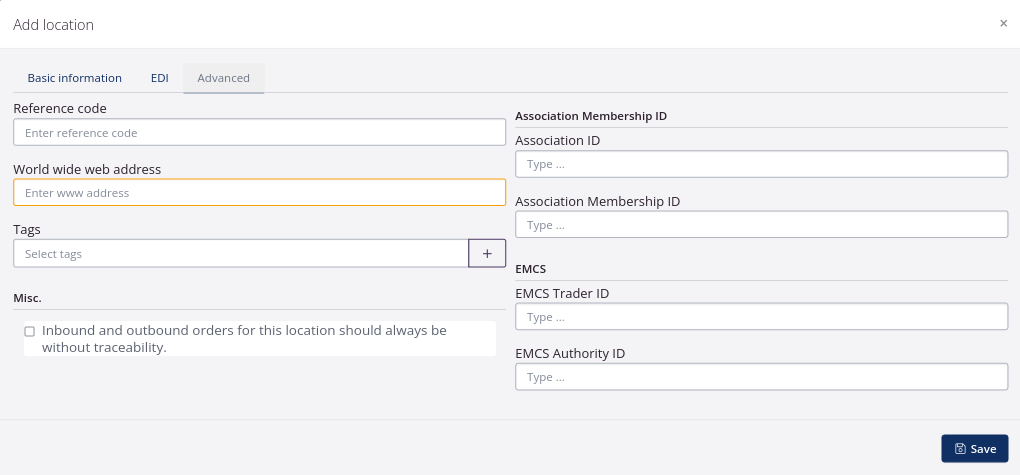
-
If relevant, enter an Association ID and Association Membership ID.
- Click Save to create the location.
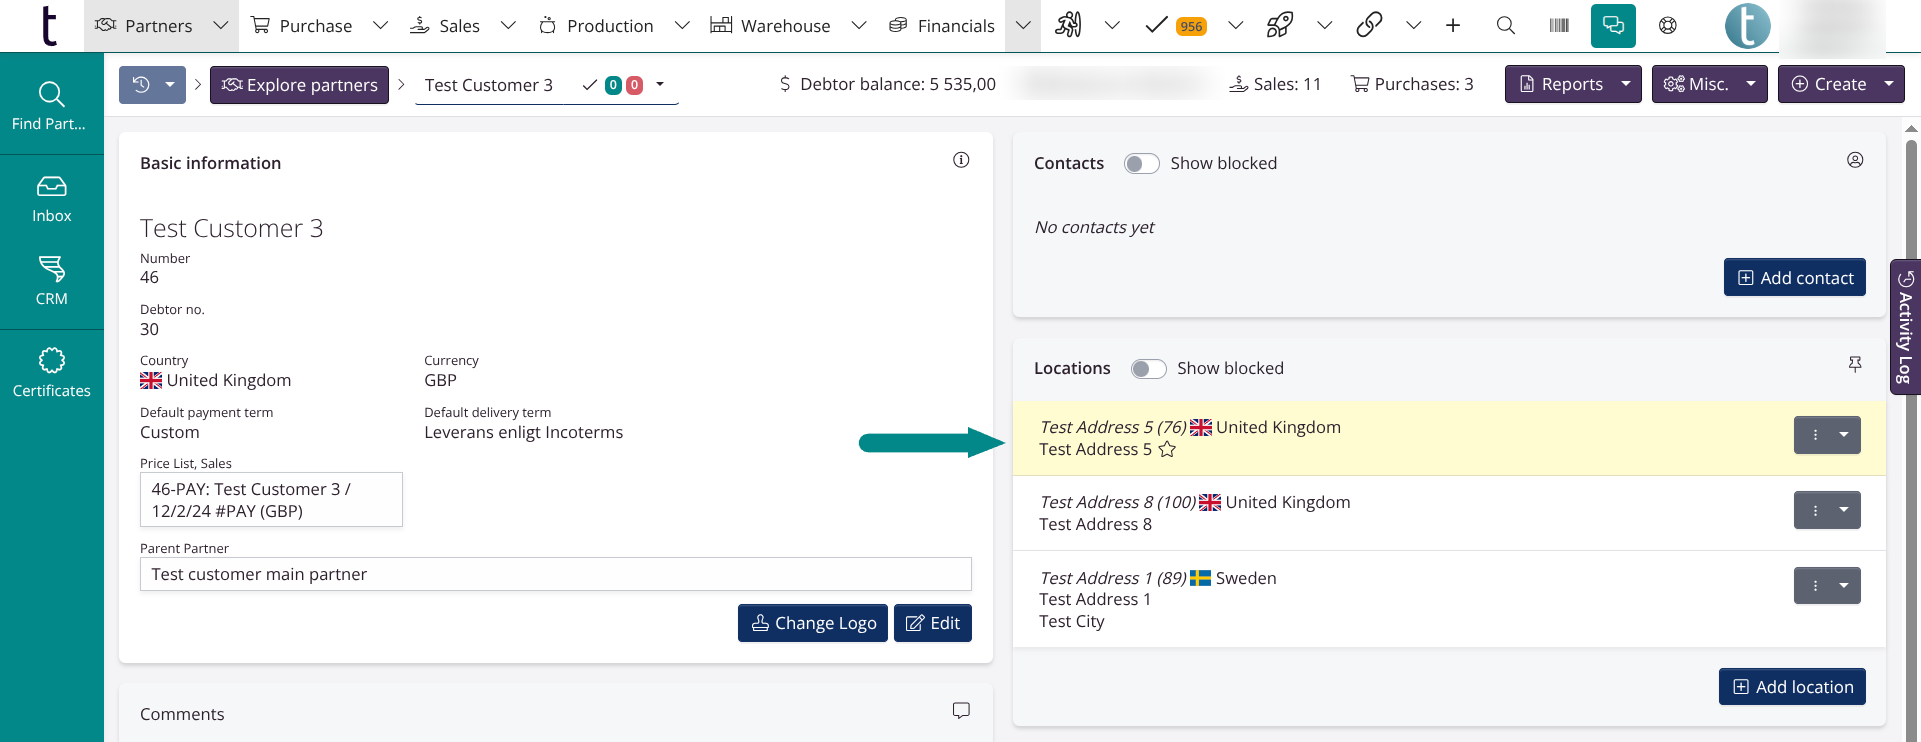
Default location
Default locations are shown at the top and are highlighted in yellow.
Parent Partner
If you have added multiple partners from the same organisation, due to e.g. different VAT IDs, or different payment terms, you can add the partners to a parent partner. It can be useful if you wish to see overall data in reports, e.g. sales reports for an organisation, or to use the Forecasting feature.
You must first create the parent organisation as a new partner, as described at the beginning of this tutorial. It is mandatory to add Name and Country. You can of course enter any other information you find relevant.
- Navigate to Partners.
- Click the button Add Partner in the upper right corner.
- When the parent partner is added correctly, you find the partners that are to be linked.
- Click Edit in the Basic Information field.
- Click the tab Relations.
- In the field Parent Partner, select the newly added parent partner organisation.
- Click Save.
Relations
In the tab Relations you can add some regular patterns of what is to happen, when an order for this specific partner is created.
By adding relations to a partner, the fields in an order, involving the partner, will be auto-filled. This shortens your workflow. It is also possible to add relations to your own partner profile.
You can overwrite the predefined relations in an order, if an exception needs to be made.
Examples
If you often use the same forwarder to and from a specific customer or supplier:
On the customers partner profile: Set Order Type to Sales > Set Partner Role to Forwarder > Choose the default forwarder in the field Partner > Choose Location > Click Save.
On the suppliers partner profile: Set Order Type to Purchase > Set Partner Role to Forwarder > Choose the default forwarder in the field Partner > Choose Location > Click Save.
If you sell goods to a shop under a main corporation via EDI, and invoices are to be sent to the main corporation and not the shop:
- On the shop’s partner profile: Set Order Type to Sale > Set Partner Role to Invoice to > Choose the main corporation in the field Partner > Choose the location of the main corporation who is to be invoiced > Click Save.
If you have a default warehouse for incoming purchase orders, and a default warehouse for outgoing sales orders:
- On your own partner profile: Set Order Type to Purchase > Set Partner Role to Deliver to > Choose your own company in the field Partner > Choose the location of the delivery (your own) > Click Save.
- Click Add one more > Set Order Type to Sales > Set Partner Role to Pickup from > Choose your own company in the field Partner > Choose the location of the pickup (your own). It is possible to choose the same warehouse in both lines > Click Save.
Delivery Profile
You can enter a delivery profile for your partner. With the delivery profile, you can specify which days of the week a customer wants delivered or a supplier can deliver. For each delivery day, you can specify the number of days from collection to delivery.
Delivery profiles can be used
- in a manual flow where the delivery and collection date is pre-filled on orders for the partner in question. It is possible to switch off the automation for the individual order.
- in the automated drop-shipping flow, where purchase and production orders are created automatically based on sales orders
- in B2B Commerce so that orders from customers with a delivery profile are created for delivery on certain days of the week
Tip: You can update partner relationships and delivery profiles via the import template, in the Relations tab.
Certificates
You can add Certificates related to your partner. This is relevant, e.g. if you produce, or buy and sell organic goods. If so, you are required to obtain and keep data on your suppliers Certificate of organic production. The certification body that issues the certification, should also be created as a partner in the application. Learn about Certificates.
Partner Comments
tracezilla works as a collaboration platform for you and your colleagues. You can enter a partner comment, e.g. an important remark, or special terms, to be remembered when processing an order to the specific customer/supplier/producer.
Partner comments are for internal use only, and will not appear on any documents.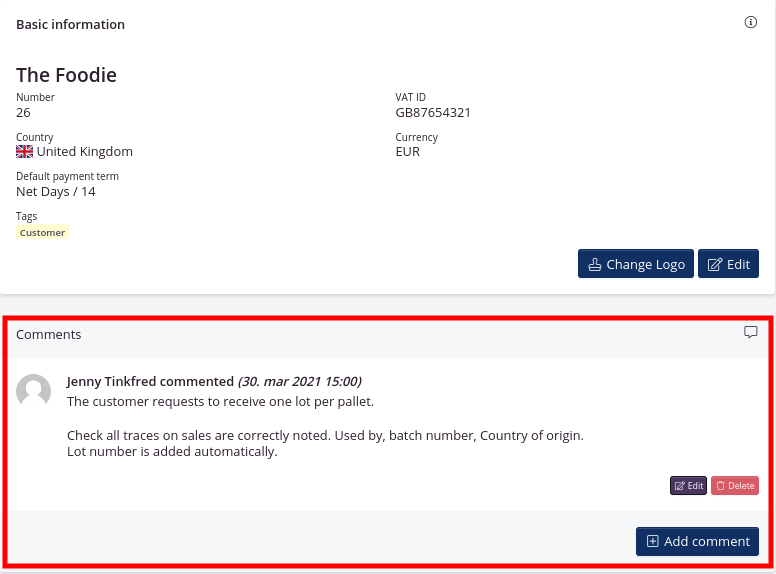
The comments will appear as a separate section on all orders. The section can be opened and closed, so multiple comments won’t interfere with the order view when closed.
If a comment is added to the partner, the comment section will blink red slowly six times, when entering the order. Hereafter the section is marked red.
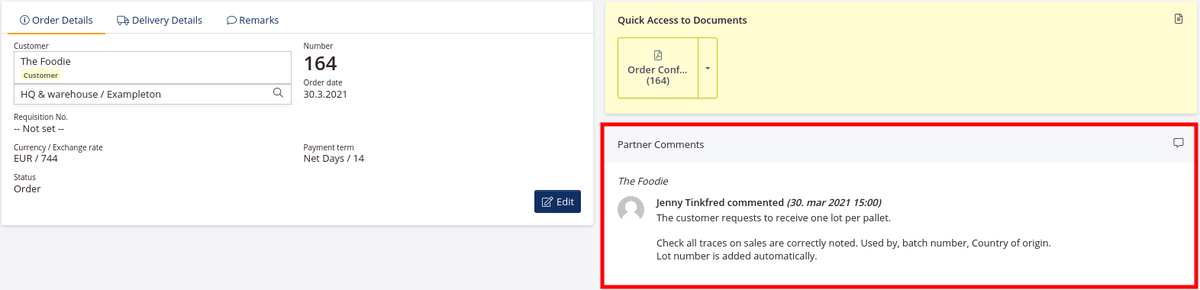
If a new partner comment is added, there will be shown a yellow field on orders, with the text New comments. This will be visible the first month after entrance, in an order’s Partner Comments section.
Contacts
Contact on documents
When a contact is added to a partner, it enables the option of adding a contact person to documents. E.g. if a contact has placed a purchase order, this contact can appear on the document, so it is clear who to contact, when there are questions related to the order, or if the delivery is delayed.
Keep track of you partners contacts
You can add contacts to the partner, for easier access, when you need to contact a specific person or department within the partner company.
Add a contact to add more recipients of e-mails
When sending documents by e-mail from tracezilla, you can choose multiple recipients. These need to be added individually as contacts.
You can tick which documents the contact will receive. All partner contacts with a tick on Invoice, will receive invoices by e-mail.
Example
An invoice must be sent to two contacts and an invoice recipient (invoice mail), John Smith, Sarah Jensen and bookkeeping@test.com
John Smith is added as a contact with e-mail address johnsmith@test.com
Sarah Jensen is added as a contact with e-mail sarah@example.com
And an invoice recipient contact is added with e-mail bookkeeping@test.comFor all three contacts the document types Invoice and Credit Note are ticked. You should always check, that the correct e-mail addresses appear, the first time you send an e-mail to the customer.

If no contact is added
In cases when no contacts are added, or when a specific document type has not been ticked off, the e-mail address entered in your Company Settings will be added automatically.
You can also add or change e-mail addresses manually, when documents are being sent by e-mail.
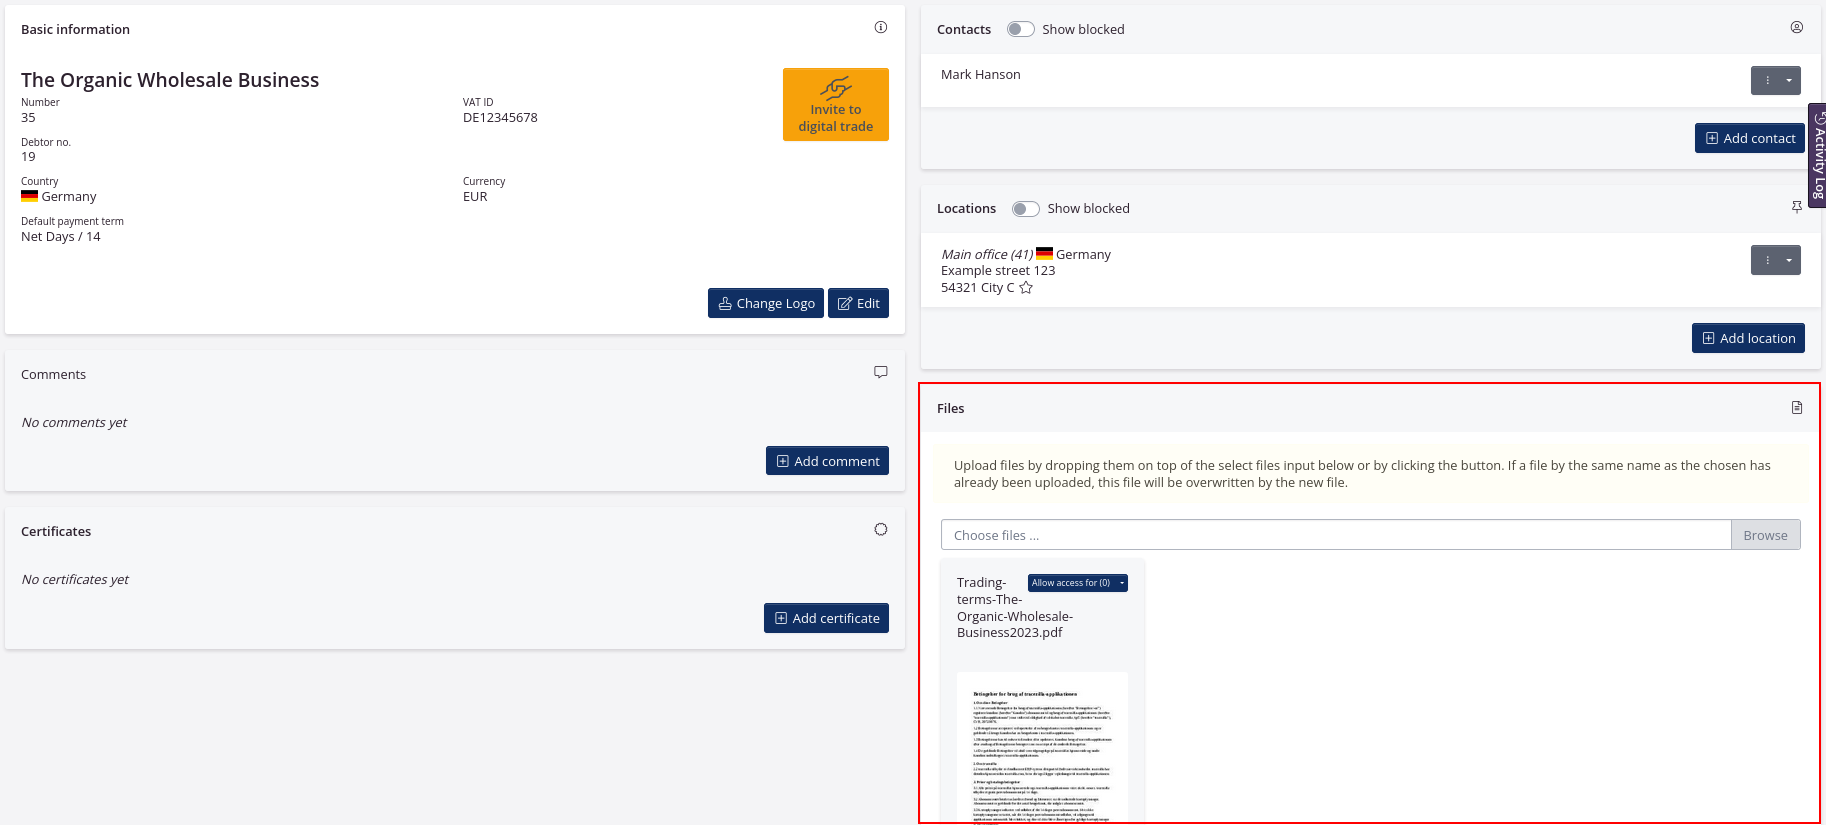
Upload files to partners
You can upload files to partners. For example, you can attach trading terms or other documents that are useful to have access to in tracezilla in relation to order processing.
Read more about partners.
Shortcuts from the partner and usefull informations
On each customer, you are able to see the debtor balance and your revenue for the specific partner. For suppliers, producers and forwarders you can see your overall amount of purchase/payment for the partner, and the number of sales and purchase orders registered for the partner.
Sent messages is a shortcut to get an overview of which documents have been sent to the partner via e-mail. By clicking Sent Messages you will be redirected to the archive of sent emails.
SKUs (Stock Keeping Units) shows how many SKUs are related to a specific partner by using partner relations. Click it to view the list of the SKUs.
Debtor balance shows the invoiced amount yet to be paid. The debtor balance will drop as the invoices are paid. The debtor balance is continuously synchronized with your accounting system. By moving the cursor over the debtor balance area, you can see when it was last updated.
Revenue shows you the overall sales amount for customers and the purchase amount for suppliers. If you click the revenue area you will be navigated to an invoice overview for the specific partner.
Orders shows you the number of sales orders/purchase orders/production orders in which the partner is registered. If you click the order type, you will be redirected to an order overview for the partner.
Next to Debtor balance, Revenue and Sales there is a shortcut for creating orders. Click Create in the upper right corner. This way a part of the the partner details will be prefilled.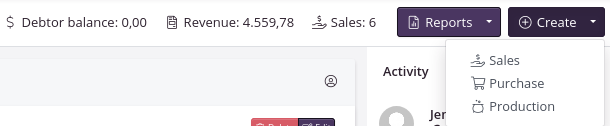
Bulk actions
Bulk actions enables you to edit multiple partners at once. You find the menu in the Partners overview.
The selected action will apply to all partners for which the box is ticked.
The following bulk actions are available:
- Add tag
- Remove tag
- Set parent partner: Select an umbrella organization, e.g. if the customer is a shop that is part of a retail chain.
- Set customer stage: The customer stage is used in the CRM feature to get an overview of active customers, leads, etc.
- Set owner: Select a user who is the customer/supplier’s primary contact person from your company.
- Set language: The default language will be used when documents are created.
- Set currency: Select the currency in which you trade with the customer/supplier.
- Set retail price currency: Is used when sending a product catalog with retail prices - the prices are set on SKUs.
- Set invoice action: The invoice action is what should happen right after an invoice is created on a sales order.
- Price List, Purchase: Assign a price list to one or more suppliers.
- Price List, Sales: Assign a price list to one or more customers. Please note that it is not necessary to assign a global price list.
- Relations: Invoice to: Add a default invoice address that should be used in sales orders.
- Relations: Forwarder: Add a default carrier/forwarder who transport goods to/from the given customer/supplier.
- Delete chosen: Only partners which has not been used can be deleted.