Custom templates
Prerequisites
Setting up the custom templates requires some coding skills.
tracezilla support can put you in contact with consultants who can help set up the template to suit your needs.
tracezilla support can not assist with the actual setup of the custom templates.
The extension is available to companies with the Trade, Production and Bundle subscriptions.
Enable custom templates
Custom templates is an extension that must enabled before use.
The extension is a part of an add-on pack. Read more about pricing and plans.
Go to Company Settings > Extensions. Find Custom Templates and click to enable.
You can now access the item Custom templates in your Company settings in the Documents and Templates section.
Scope of use
Custom templates have several use areas. It is possible to create documents and display them on orders, deliveries, recipes and partners. It is also possible to add product descriptions to products in B2B Commerce. Examples of custom templates are pallet labels, production order documents and product sheets.
But the use is not limited to tailor-made documents - you can also create dashboards in HTML. This may be relevant if you want to create dashboards that contain icons and custom colors and other settings that cannot be created with Custom Dashboards.
Create template
Go to Custom Templates in your Company Settings.
- Click Create Template
- Name the template and give it a reference code for internal use
- Select which Model the template is to be used for. Currently, you can create templates for orders and deliveries. If you select Order, you can specify which order types it can be used for.
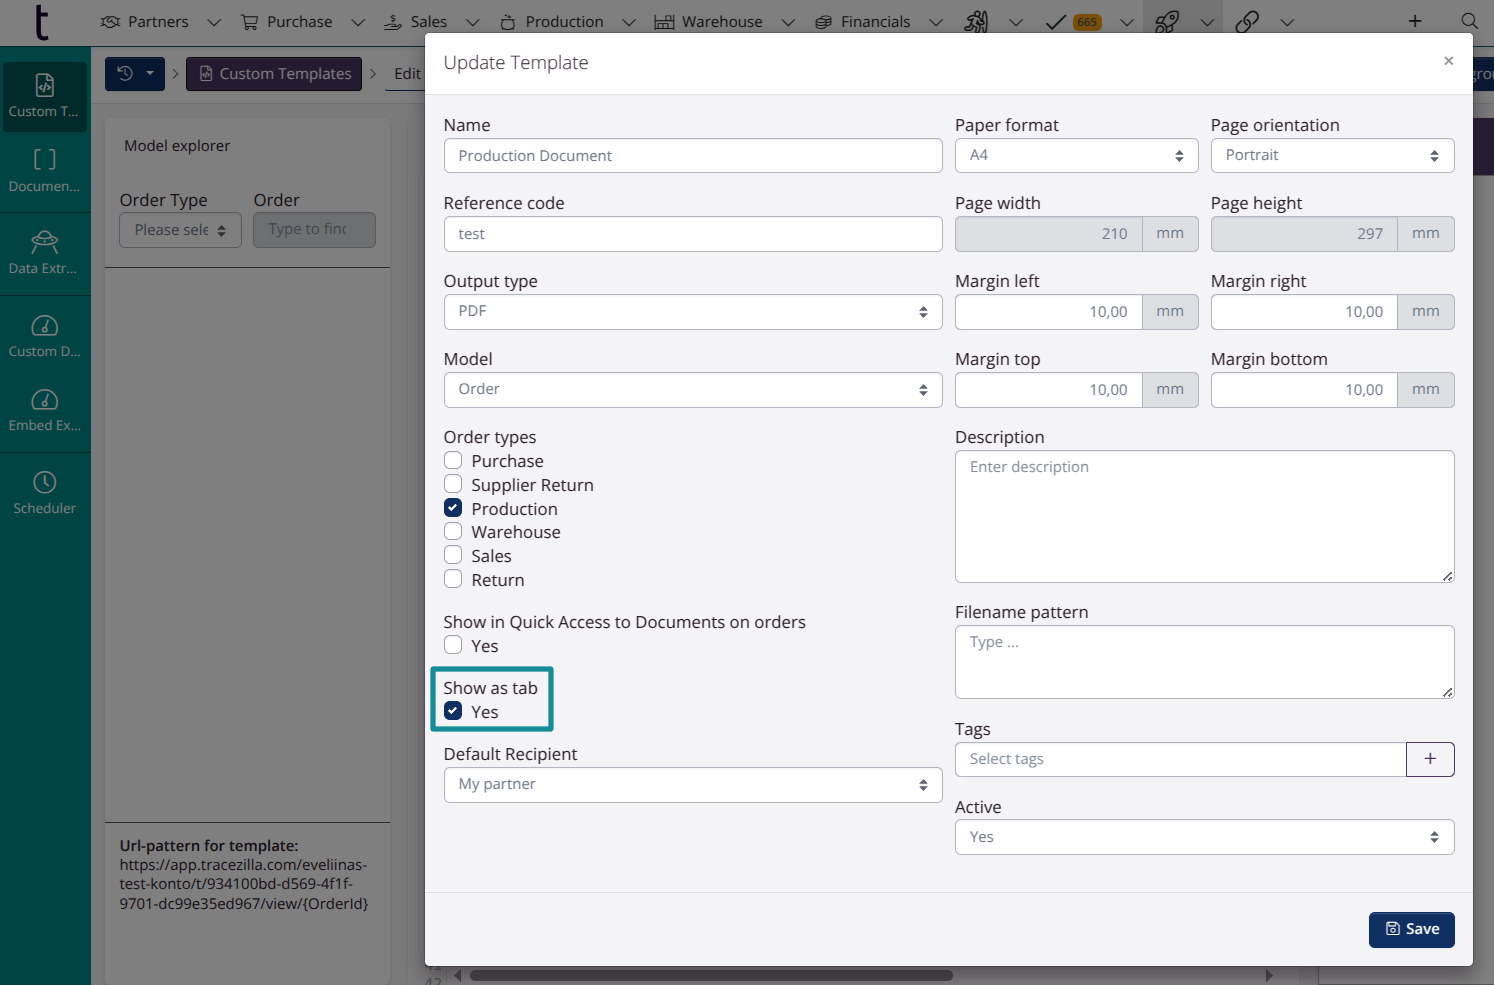
- Specify whether the document is to be displayed in Quick access to documents on the individual order.
- In the dropdown menu Default Recipient, you can specify who should be the default recipient of the e-mail with which the document is sent.
- The Description field is for internal use and will not be included in the document
- You can customize the format, page orientation, width, height, and margins.
- Click Save
Contents of the template
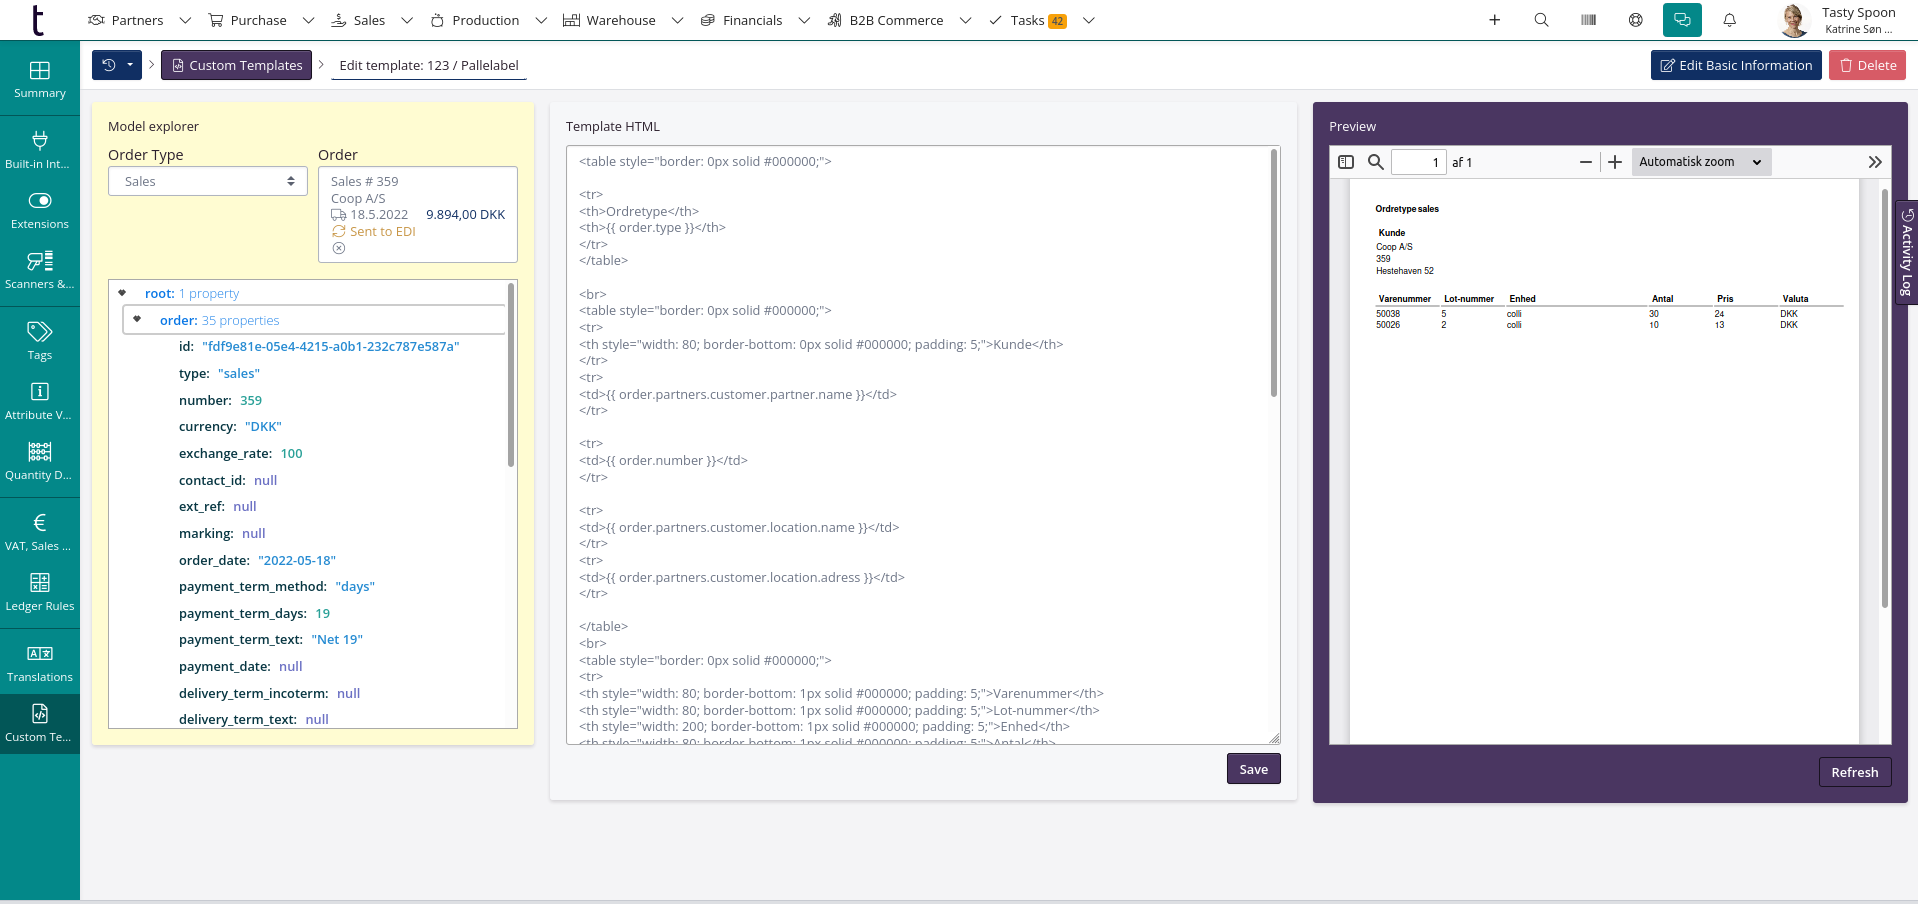
The template itself is set up using a sort of template HTML and LIQUID, which is a light programming language.
The template HTML is used to create the layout and the fixed content of the template. It does not use classic HTML but a kind of HTML developed to make this type of template.
LIQUID is used to retrieve the dynamic content - that is, the content that varies from time to time such as partner, location, batch, order number, date, price, etc.
LIQUID can also be used to insert conditions, e.g. rules stating when something should be displayed and when not. It can also be used to do formatting of date formats, number formats and the like.
-
In the section in the middle, the setup is made in HTML and LIQUID.
-
In the section on the left, you can select an example for which the template should be displayed. Once you have selected an order or delivery, you will have access to a hierarchy of properties that can be inserted into the template. These properties are the dynamic content.
-
In the section on the right, you can see what the template will look like given the example you have selected on the left.
The properties available
Select an existing order or delivery in the section on the left, .
When you click on Root, a hierarchy of properties will unfold.
Place the cursor in the position in the HTML template where you want to insert the property and click on the property in question.It will now be added to the HTML template as LIQUID syntax.
When you save the HTML template, the result will be visible in the Preview section on the right.
Resources
Shopify has a publicly available documentation of the LIQUID template language used.
You can read more about LIQUID here on tracezilla’s tech page.
We are working to establish a similar documentation of the HTML template language used.
Pictures e.g. logo is added as base64 codes. You can find resources by searching for base64 code on the internet. For example this website.
On the website in question, an image is uploaded, and then you get the base64 code back. The code is inserted into the custom template.
<img src="insert-here" />
Show templates as tabs
You have the option to show custom document templates as tabs on orders.