Data Extracts
Data extraction makes it possible for you to define which raw data you want to extract in your own customized report. All the data is pulled live from tracezilla and you can share the data extract via an IP-protected access. The extract can be shared to other programs, e.g. Google Sheets or data visualization tools like Power BI. You can also download the extract as a file with the current results in the report.
Prerequisites
Access to the module requires the Power Pack add-on. Read more about Pricing and plans.
tracezilla support can refer you to consultants who can help set up a data extraction to suit your needs.
tracezilla support cannot assist with the setup of data extracts, beyond the 3 hour onboarding that comes with purchasing the Power Pack.
Enable Data Extracts
Data Extracts is an extension that must be enabled before you can use the module.
Go to Company Settings > Extensions. Find Data Extracts and enable it.
Create data extract
Go to Data Extracts in your Company Settings.
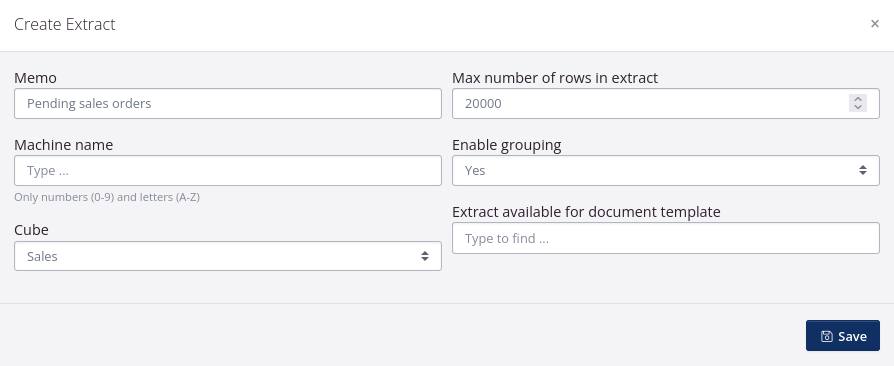
- Click Create extract.
- Give the extract a name or short description in the Memo field.
- It is optional to give the extract a machine name which can be some form of code.
- Select which Cube the data extract should be based on.
A cube defines which sets of data tracezilla retrieves raw data from. If you would like to create a sales report, select Sales, for example. Thus, you will primarily look at the raw data from the sales orders and the associated data.
- Specify the maximum number of rows in the extract. This can be changed at a later stage and expanded to up to 20,000 rows.
- Choose whether the data should be grouped, i.e. collect some of the rows in the extract.
By enabling grouping, tracezilla will be able to collect multiple lines to one for the same type of data. For example, if you want to create a data extract based on sales, you can add a Source filter in the data extract, so that the report’s data is displayed per SKU.
- You can combine the functionality of Data extracts with the Custom templates module for e.g. to set up simple websites. Then select the custom template in the field Extract available for document template.
- Click Save.
Select fields for the data extract
You define which data should be set up in the table by selecting fields from the menu on the left.
The menu unfolds by clicking on the arrows. The menu is structured as a hierarchy based on the selected cube.
If you have selected the Sales cube, the first fields will be fields directly from the order, e.g. order number, currency, delivery date, requisition number, etc.
The related information is, for example, data from the partner itself (e.g. partner name), the SKUs (e.g. SKU code, SKU name, units of measure) or the specific lot (e.g. lot number, country of origin).
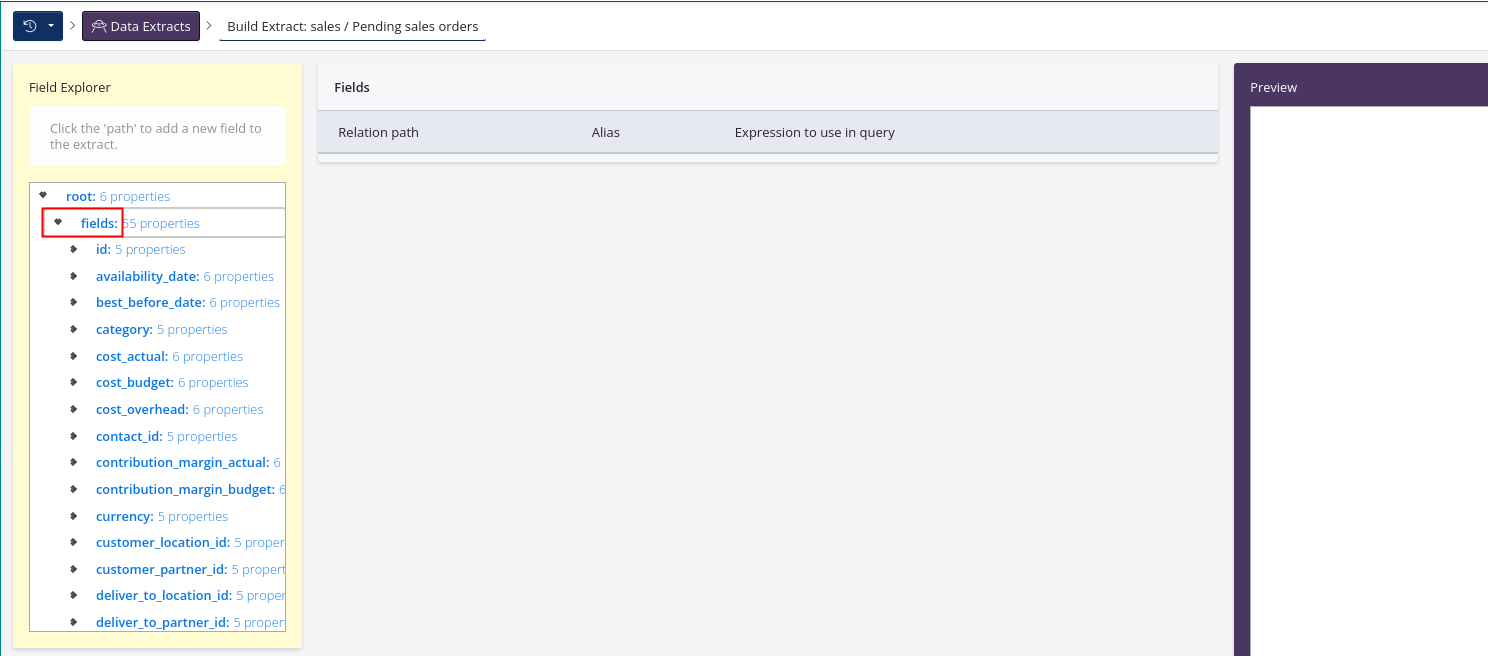
Add field to extract
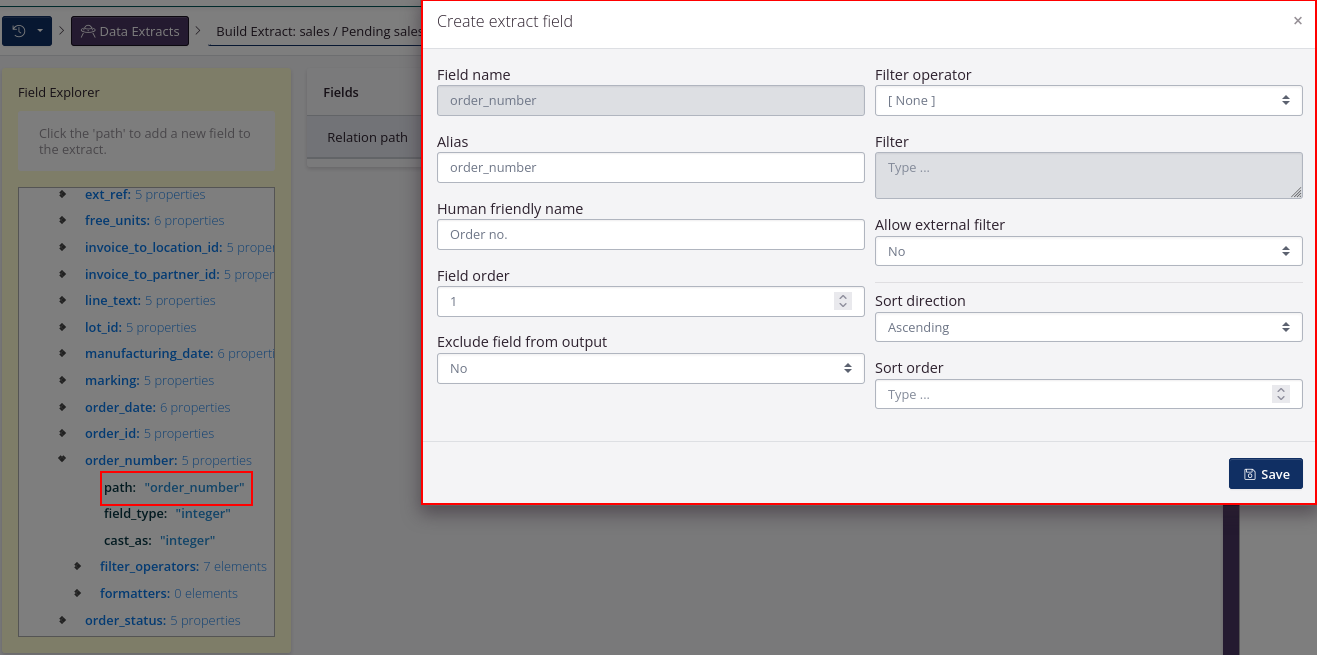
Click path: xxx (field name) to add it. A dialog window will appear where you can adjust the field settings.
| Field | Explanation |
|---|---|
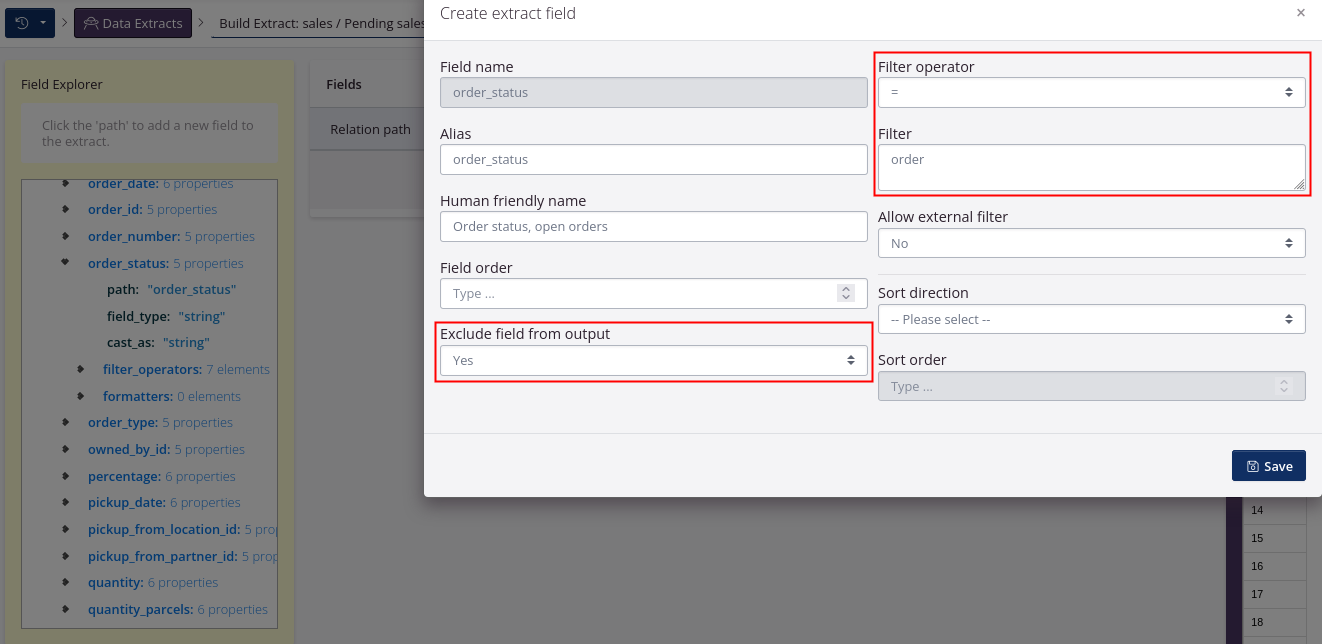
| Field name | The system field name. The field is locked and therefore cannot be overwritten. With this field, you can always see where data originally comes from, regardless of changes in Alias or Human Friendly Name. |
| Alias | The field is automatically filled in. You can overwrite the name and add extra suffixes. You can use Alias to distinguish between several fields of the same type, e.g. by adding two fields for delivery_date, each with its own format. Eg. the YYYY format can be named deliver_date_year and the MM format can be named delivery_date_month. |
| Human friendly name | You can name the column yourself as it should appear in the report. |
| Field order | It is optional to specify a column number to determine the position of the column in relation to other columns in the report. |
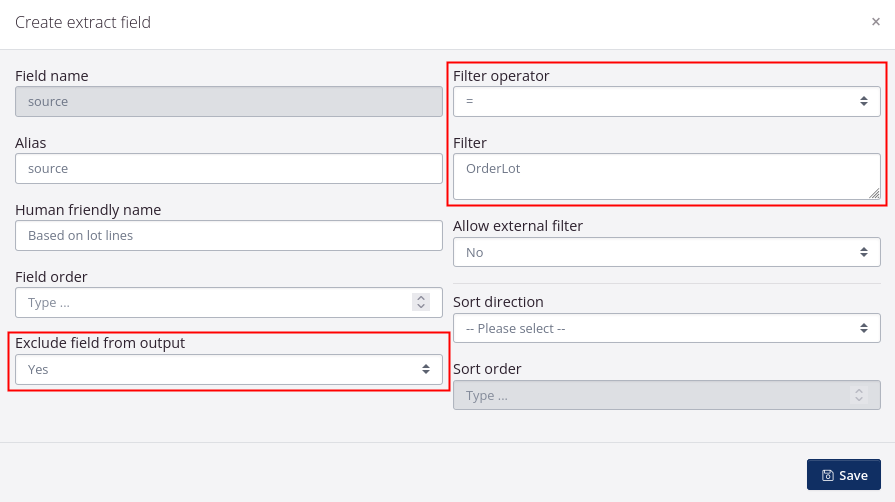
| Exclude field from output | Choose whether the column should be displayed in the report or hidden. It may be relevant to hide source filters or other filters. |
| Filter operator | It is optional to use the filter function. Specify whether the field should limit which results are displayed in the data extract. |
| Filter | You get the option to specify which type of data should be filtered on if you have selected a filter type. |
| Allow external filter | If you share the data extract using Direct data access, you can make it possible to use the field’s data as a filter in, for example, Excel, Google Sheet or similar programs |
| Sort direction | You can specify whether this field should determine the sorting of the results (optional) and, if so, whether it should be ascending (eg 1, 15, 90, 130) or descending (130, 90, 15, 1). |
How to apply a filter
You can insert filters so that not all data of a type (for example, all sales orders) is displayed in the results.
For example, use the filter = (equals to) to specify the specific order status. Among other things, it can be order (open orders), invoiced or delivered.
Tip!: Add the field without the filter at first and without the field is excluded from the results. Then you will be able to see the system’s designation for the status or other values for which you will add the filter. Once you have seen the designation, you can edit the field and insert it.
How to use the source field
It is recommended that a source field is added with a filter to specify which data is the ‘primary’ on which the report is based.
The source can be, for example, lots (OrderLot), service lines (OrderServiceLine) or budget posts (OrderBudget).
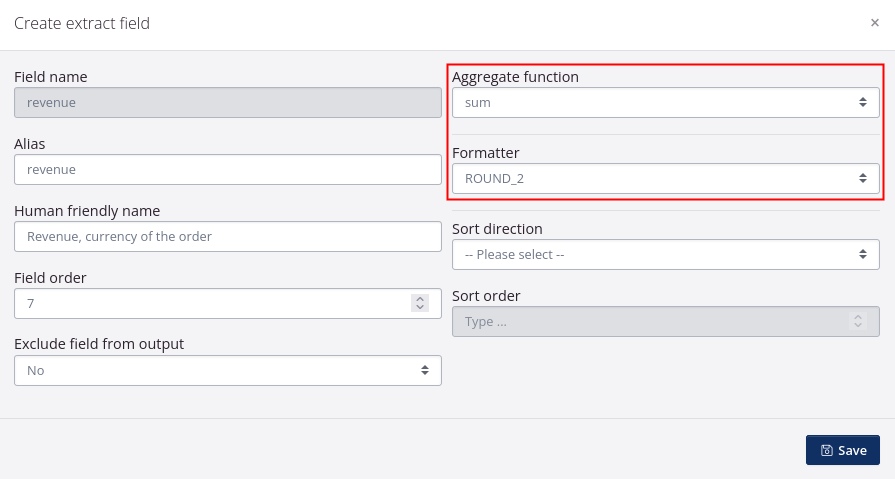
How to use aggregation function
In some number fields, an aggregation function is built in. This is also the case in some date fields.
The aggregation function can sum the number of similar units, e.g. a sum per order (amount) or a sum per SKU (quantity).
On date fields, the aggregation function can be used to display the earliest date (min) or latest date (max).