Create credit note for price correction - financial
See how to 1) create a credit note based on a separate line for a price correction or 22) how to create a credit note so that the price can be corrected and a new invoice can be created.
You will find more tutorials to create credit notes due to specific reasons here.
The customer wants to receive a price correction on a supplementary invoice/credit note
If the customer does not want to receive a credit note for the entire invoice and then a new invoice - but just a document based on the difference, you can add a price correction as a service line.
Please note, that this method to create invoices or credit notes is not compatible with sending documents using EDI.
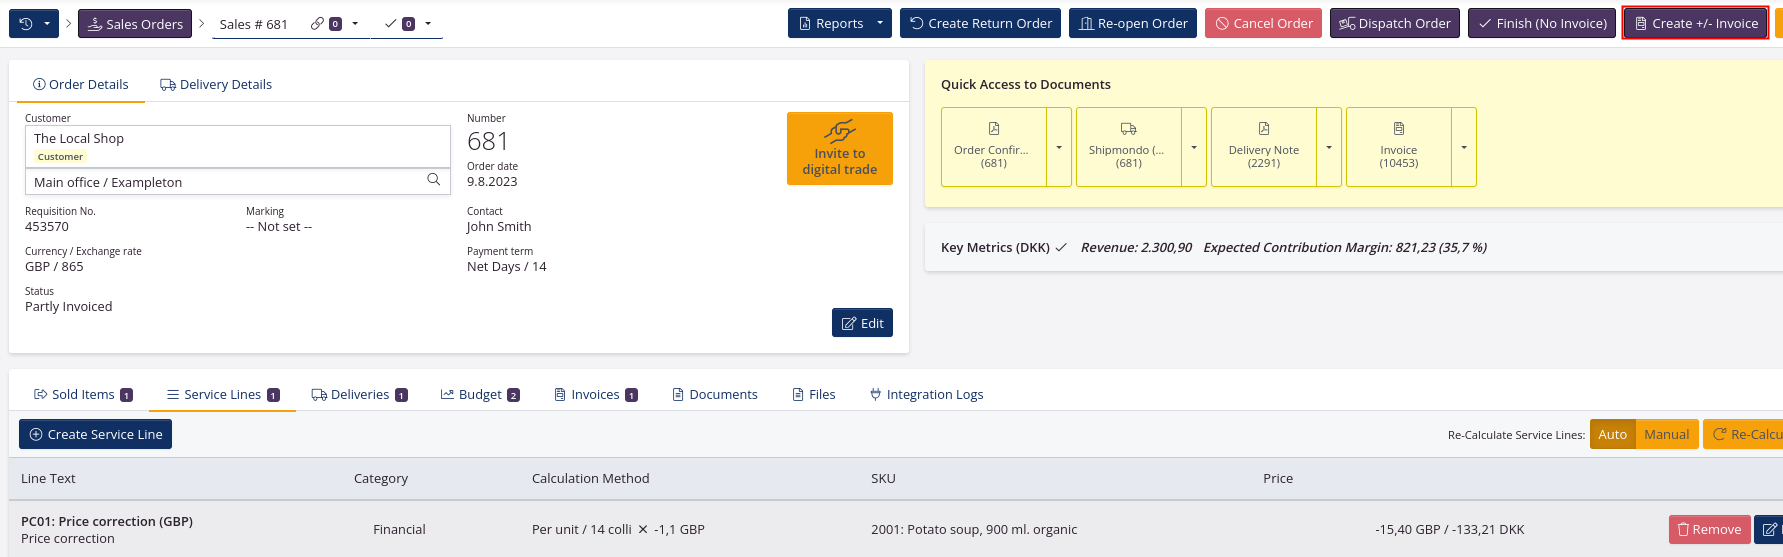
- Go to the relevant sales order.
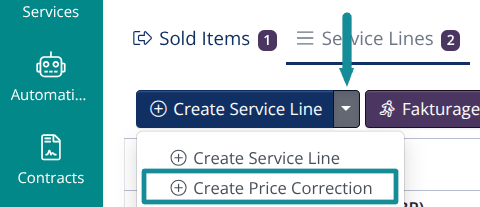
- Click the tab Service lines. Then click the arrow in the Create Service Line-button.
-
Click Create Price Correction-button.
-
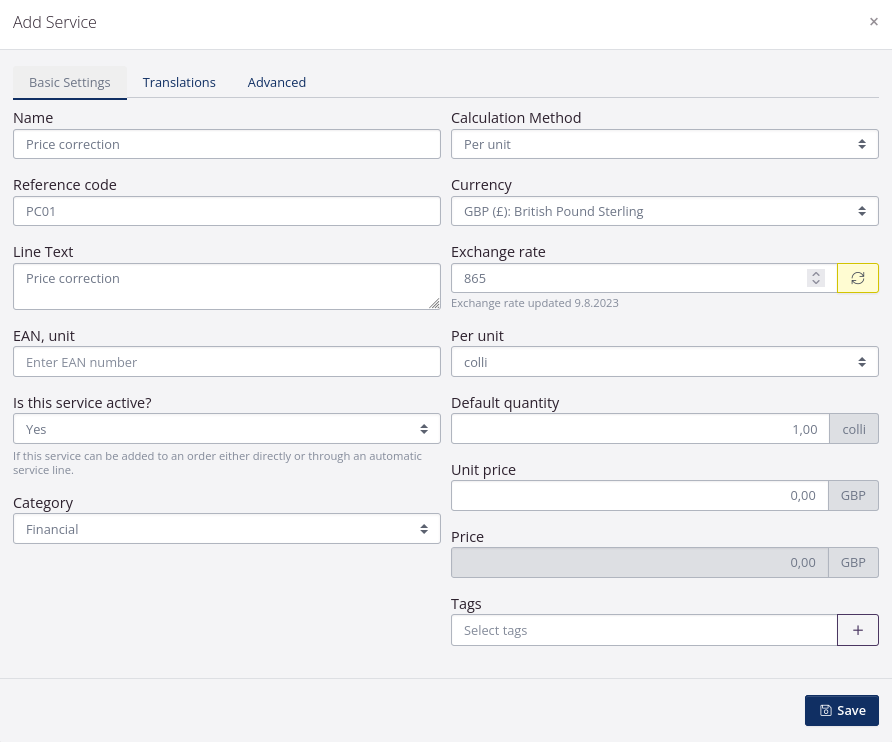
You can choose an existing service line or click the +-symbol to add a new predefined service. You can read more information here.
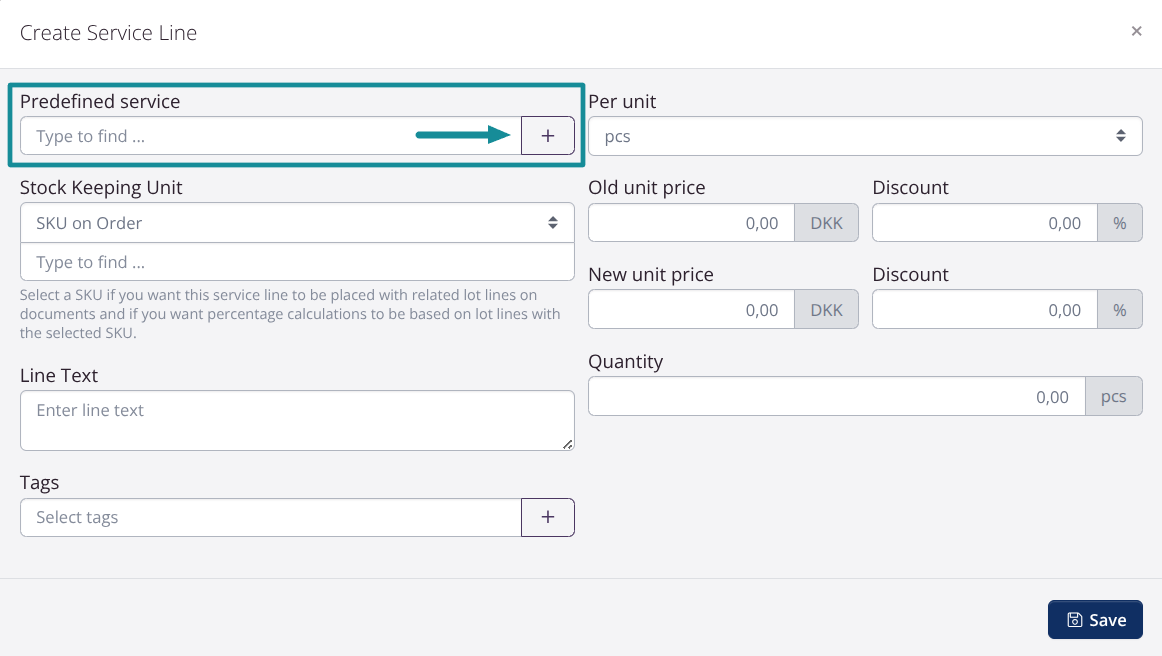
It is an advantage to create a predefined service, as you can manage how the amount is posted in your accounting system. In addition, you also avoid having to enter the same information time after time.
-
Once the service is created, you will be directed back to adding the service line on the specific order. Here you can select a specific SKU to which the price correction relates in the field SKU on Order.
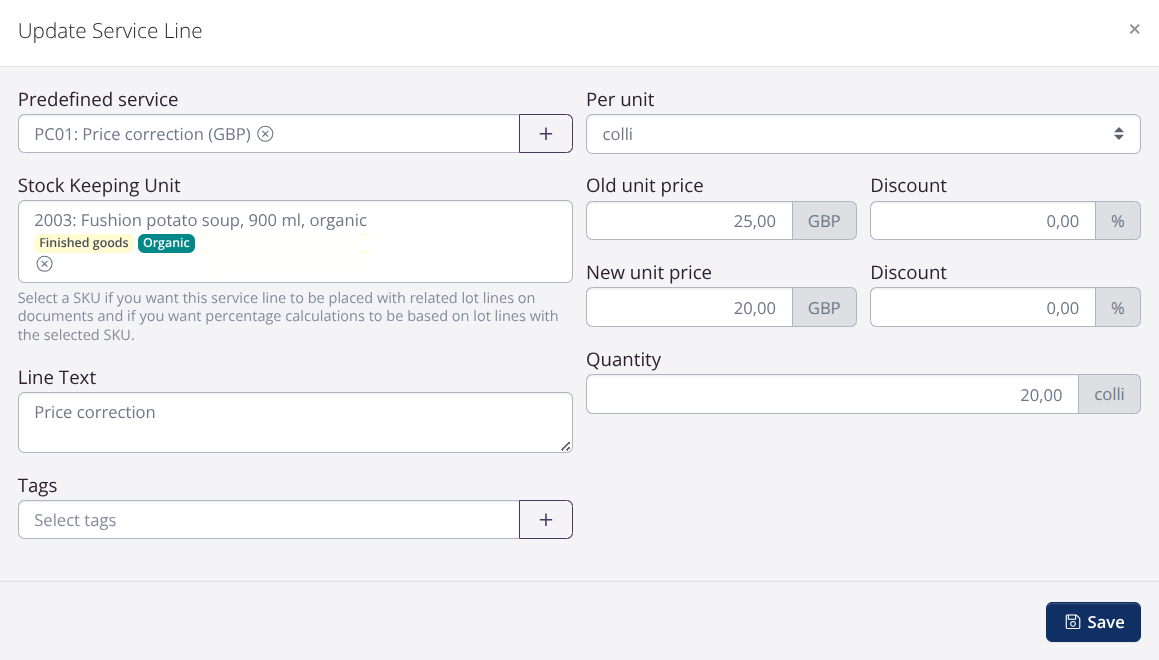
- Choose right unit (pcs, colli etc.). The old unit price and the eventual discount is shown automatically when you choose a SKU, that is added to the order. Write the correct price in the field New unit price. If the discount needs to be corrected you should also write the correct discount in the discount-field next to the New Unit Price. NB! The discounts should be written without minus.
- Enter the quantity, that the price should corrected for, in the Quantity-field.
- Click Save. If the price needs to be corrected for several SKUs on the order, a new service line with a different SKU is added.
- When all the relevant price corrections have been added, click Create Invoice.
- Correct, if necessary, the invoice date and check that the payment terms are correct. Click Create first as draft.
- Click View document and check that all lines on the document are correct.
- Click Re-sync and finalize invoice.
- Send the document to the customer.
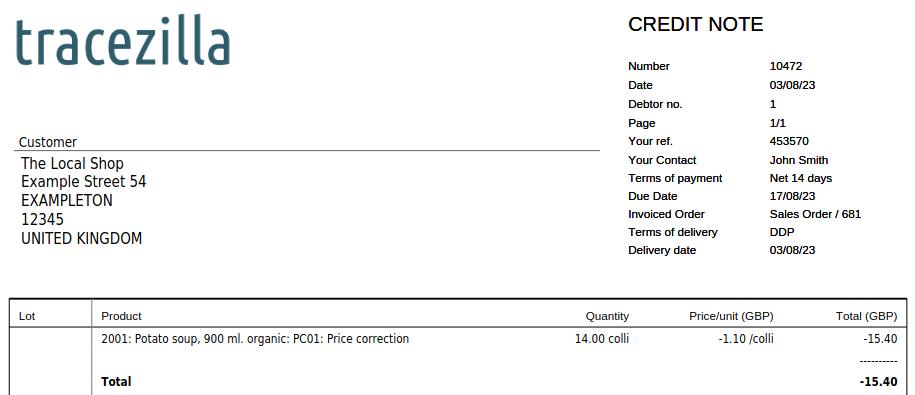
Example credit note
General about supplementary invoices
-
tracezilla will create an invoice if the total on the document is positive. If the total is negative, tracezilla will create a credit note.
-
You can easily add both positive and negative price corrections to the same document.
The unit price on a lot line must be corrected
This procedure is compatible with EDI orders and documents to be sent via EDI.
When the price of on a lot line needs to be changed e.g. from EUR 10 to EUR 8 per unit, a credit note must be created for the entire invoice.
- Go to the relevant sales order.
- Click the arrow next to the invoice. Select Go to.
- Click Create Credit Note. Confirm by clicking Create Now.
- Send the credit note to the customer.
- Click Go Back.
- Click the lot line where the price is to be edited. The lot line opens so that the lot number becomes visible.
- Click the blue button with three dots. Select Edit.

- Correct the price in the field Unit price and click Save.
- Please note: If service lines have been added to the order, remember to update these. Click the tab Service Lines and then click Re-Calculate on the right side.
- When all corrections in the price have been made, click Create +/- invoice.
- Check that all information in the dialog window is correct. If needed, write a comment in the field Remarks.
- Click Create as draft first. Click View Document to check that all informations are correct.
- Click Re-sync and Finalize.
- Send the document to the customer.